Table of Contents
- Damage Assessment: Identifying What Needs Fine Art Restoration
- The Fine Art Restoration Process: From Surface Cleaning to Varnish Removal
- Fine Art Packing and Crating for Transport to a Conservator
- Understanding Painting Restoration Cost: What Drives the Price
- Art Insurance Requirements and Claims Handling for Damaged Pieces
- DIY vs. Professional Risk Assessment: When to Call a Conservator
- Digital Documentation and Preventative Conservation
- Conclusion: Protecting Your Collection with Expert Care
- Frequently Asked Questions
Last Updated: September 28, 2026
Damage Assessment: Identifying What Needs Fine Art Restoration
Fine art restoration is the careful process of repairing and preserving artworks so they survive for future generations. Before any treatment begins, a trained conservator must assess the damage. This step decides everything that follows.
A Four-Pass Assessment You Can Do Safely
Work in this order, and stop the moment anything looks unstable.
What You Are Looking For
- Cracking, flaking, or lifting paint (called cupping when edges curl upward)
- Discolored or yellowing varnish
- Water stains, mold, or smoke residue
- Tears, holes, or sagging canvas
- Loose or damaged frames, and rusted hardware
- Foxing, the small brown spots that signal moisture and possible mold
- Bloom, the cloudy haze that forms on varnish in humid conditions
The DIY vs. Professional Decision Rule
The question is not “can I fix this?” It is “can I afford to be wrong?” Use this rule:
- Safe for a collector: dusting a stable, low-value piece with a soft brush; improving storage conditions; documenting condition; moving a piece with proper support.
- Not safe for a collector: anything involving liquid, solvents, adhesives, heat, or pressure. That includes wiping, scrubbing, ironing a canvas, applying household cleaners, and “testing” a product on a hidden corner.
- Call a conservator immediately: active mold, flaking or powdering paint, a growing tear, smoke or water damage, a sagging canvas, or any piece you plan to insure, sell, or lend.
Never wipe, scrub, or apply household cleaners to a damaged piece. You can push pigment into the canvas or spread mold, turning a small repair into a costly one. If you are unsure, stop and photograph instead.
When to Escalate Beyond a Conservator
Some findings require more than a treatment plan. If you see active mold, evidence of pests, or damage that suggests the piece was stored in a flood or fire, you may also need a fine art appraisal update, an insurance notification, and a conservator who specializes in that damage type. Bring your documentation to that first conversation, it shortens the assessment and often lowers the initial billable hours.
American Institute for Conservation, disaster response and damage assessment
The Fine Art Restoration Process: From Surface Cleaning to Varnish Removal
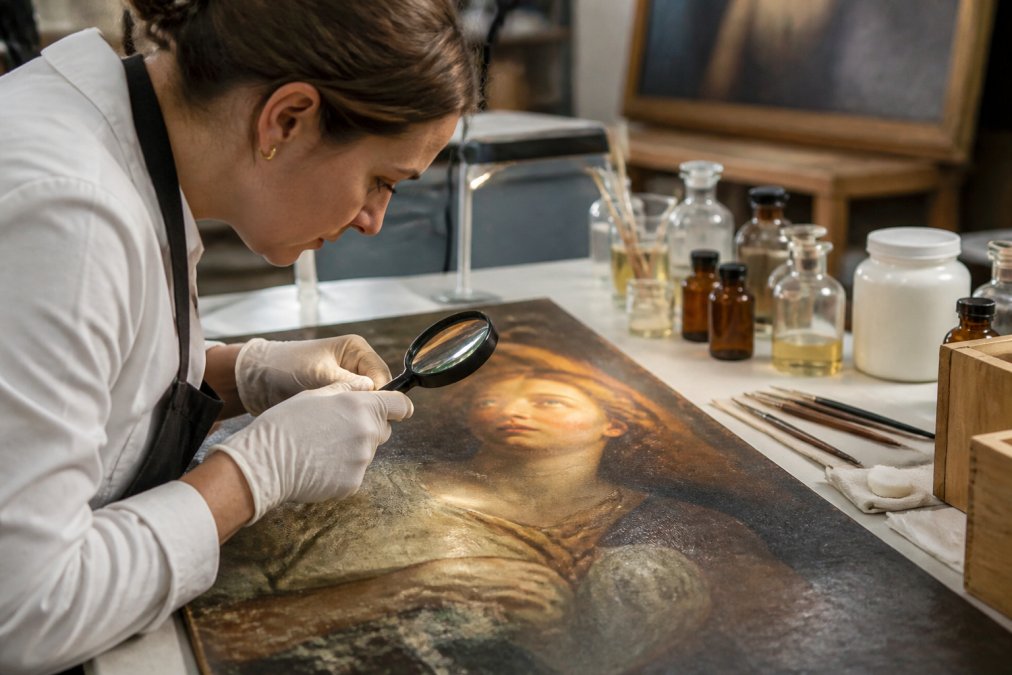
The fine art restoration process moves from the least invasive steps to the most involved. Conservators follow a simple rule: do as little as possible to make the piece stable and readable again.
Canvas Relining and Structural Stabilization
When a canvas sags, tears, or grows brittle, it needs structural help. Canvas relining attaches the original canvas to a new support for strength. Conservators also patch tears and tighten loose fabric. These steps restore structural integrity without hiding the artist’s original work.
Fine Art Packing and Crating for Transport to a Conservator
Fine art packing and crating protects a piece on its way to the conservator. Most damage happens in transit, not in the studio. A proper crate holds the artwork still and blocks moisture, dust, and impact.
Good packing follows strict art handling protocols:
- Wrap the piece in archival, acid-free tissue
- Add glassine or foam barriers against the surface
- Build a custom wooden crate sized to the work
- Use corner blocks so the art never touches the crate walls
- Label the crate “fragile” and note which side faces up
Ask your conservator for the crate back after treatment. A well-built crate can be reused for future moves, storage, or loan exhibitions, saving you money later.
Understanding Painting Restoration Cost: What Drives the Price
Painting restoration cost depends on the type and amount of damage, not just the size of the piece. Two paintings the same size can differ widely in price. The useful part is understanding how a conservator actually builds a number, so you can read an estimate instead of just reacting to the total.
The Three Pricing Models You Will See
Conservators and studios generally quote one of three ways:
- Hourly plus materials. Common for condition assessments, surface cleaning, and small in-painting. You pay for time logged and supplies consumed. Ask for the hourly rate and a not-to-exceed cap.
- Flat fee per treatment. Common for defined jobs like a single tear repair or a varnish removal on a standard-size canvas. The conservator absorbs the risk if the job runs long.
- Phased or capped estimate. Common for complex or uncertain pieces. The conservator quotes the first phase (stabilization), then re-quotes after the piece is on the table and the true condition is visible.
A common pattern is that the initial written estimate is a range, not a fixed price, because hidden damage, old repairs, overpaint, a previous relining, is often invisible until cleaning begins. Reputable conservators disclose this up front rather than surprising you mid-treatment.
How a Conservator Builds the Number
When you ask for a written estimate, a thorough one breaks down into line items like these:
- Condition assessment and written report. Often a separate, billable first step. This document is what your insurer will want.
- Treatment hours by phase. Surface cleaning, varnish removal, tear repair, in-painting, and structural work are usually priced separately because each carries different risk.
- Materials. Solvents, consolidants, archival adhesives, lining canvas, stretchers, and in-painting pigments. Museum-grade materials cost more and are usually itemized.
- Structural work. Relining, tear mending, and stretcher replacement are the most labor-intensive line items and the ones most likely to change the total.
- Documentation and photography. Some studios bill for before/after imaging and treatment records; ask whether it is included.
- Crating, transport, and insurance. Often quoted by a separate vendor. These are frequently forgotten when collectors budget.
A Practical Cost-Estimation Framework
Use this to sanity-check any quote you receive. It is a framework, not a price list, actual figures vary by region, conservator, and piece.
| Damage Level | Typical Treatment | What Drives the Number |
|---|---|---|
| Light | Surface cleaning, dust removal, minor consolidation | Hours on the surface only; low material cost |
| Moderate | Varnish removal, minor in-painting, small tear repair | Solvent testing, color matching, reversibility testing |
| Heavy | Relining, structural stabilization, extensive in-painting | New support, weeks of studio time, senior conservator hours |
| Severe | Mold, smoke, or water damage | Stabilization first, then full treatment; often phased |
Questions That Change the Quote
Ask these before you sign anything:
- Is the estimate hourly, flat, or phased?
- What is excluded, crating, transport, insurance, re-framing?
- What happens if hidden damage is found mid-treatment?
- Will I get a written condition report and before/after images?
- Are treatments reversible, and does that affect the price?
Ask for the estimate in phases. A phased quote lets you approve stabilization first, see the piece, and then decide whether to fund full aesthetic restoration. It also gives your insurer a clean paper trail if the claim is partial.
Where Collectors Overspend
The most common overspend is commissioning full aesthetic restoration on a piece whose value does not justify it. A conservator can tell you the difference between stabilization (stopping deterioration) and restoration (returning appearance). For many mid-value works, stabilization alone protects the asset at a fraction of the cost. Ask explicitly which one your quote covers.
American Institute for Conservation, finding a conservator
Art Insurance Requirements and Claims Handling for Damaged Pieces
Art insurance requirements vary by policy, but most insurers want proof of value and condition. A fine art appraisal sets that value. Keep it current, since insurers often ask for updates every few years.
When damage happens, follow these steps:
- Photograph the damage before you touch anything
- Contact your insurer right away
- Get a written condition report from a conservator
- Keep every receipt for packing, transport, and treatment
Your documentation is your strongest asset in a claim. Photos, appraisals, and condition reports do more to protect your payout than any single phone call.
DIY vs. Professional Risk Assessment: When to Call a Conservator
DIY vs. professional risk assessment comes down to one question: can you afford to be wrong? For low-value decorative pieces, gentle dusting is fine. For anything with real value, call a conservator.
Call a professional when you see:
- Active mold, flaking, or a growing tear
- Smoke or water damage
- Loose paint or a sagging canvas
- Any piece you plan to insure or sell
Digital Documentation and Preventative Conservation
Digital documentation and preventative conservation keep small problems from becoming big ones. Document each piece with high-resolution photos, a written condition report, and its history. This record, called provenance, proves ownership and value.
Preventative care is mostly about control:
- Keep humidity regulation steady, since swings cause cracking
- Limit light to reduce UV protection needs and fading
- Store works in archival materials, never plastic wrap
- Check for oxidization and mold every few months
Conclusion: Protecting Your Collection with Expert Care
Caring for fine art takes patience and the right hands at every step. Damage can start small and spread fast, so early action matters.
Frequently Asked Questions
How much does fine art restoration cost?
Painting restoration cost depends on the extent of damage, the size of the piece, and the techniques required. Minor surface cleaning may cost less, while structural repairs like canvas relining or in-painting push costs higher. Most conservators charge hourly or by project scope. WePackYou recommends requesting a detailed written estimate that breaks down labor, materials, and any specialized treatments before committing to a restoration plan.
What is the difference between art restoration and art conservation?
Art restoration focuses on returning a piece to its original appearance, often using in-painting or varnish removal. Art conservation prioritizes long-term preservation using reversible treatments and archival materials that stabilize the work without altering its character. Conservators follow museum-grade techniques and curatorial standards. For valuable pieces, conservation is usually the preferred approach because it protects both structural integrity and future restorability reporting.
When should I seek professional art conservation services instead of handling it myself?
Call a professional when the damage involves structural issues like tears, flaking paint, or canvas relining needs. DIY attempts at surface cleaning or varnish removal can cause irreversible damage, especially on older pieces with unstable pigment. If the artwork has sentimental or market value above a few hundred dollars, professional assessment is worth the cost. Conservators also document existing damage for insurance valuation and future provenance records.
What are art insurance requirements for a damaged piece during restoration?
Most fine art insurance policies require you to report damage promptly and provide documentation such as photographs and appraisals. Before restoration begins, notify your insurer and get approval for the conservator you plan to use. Keep all receipts and a condition report from the conservator. WePackYou advises reviewing your policy’s coverage limits and deductibles, since some policies cap restoration payouts or exclude gradual deterioration.