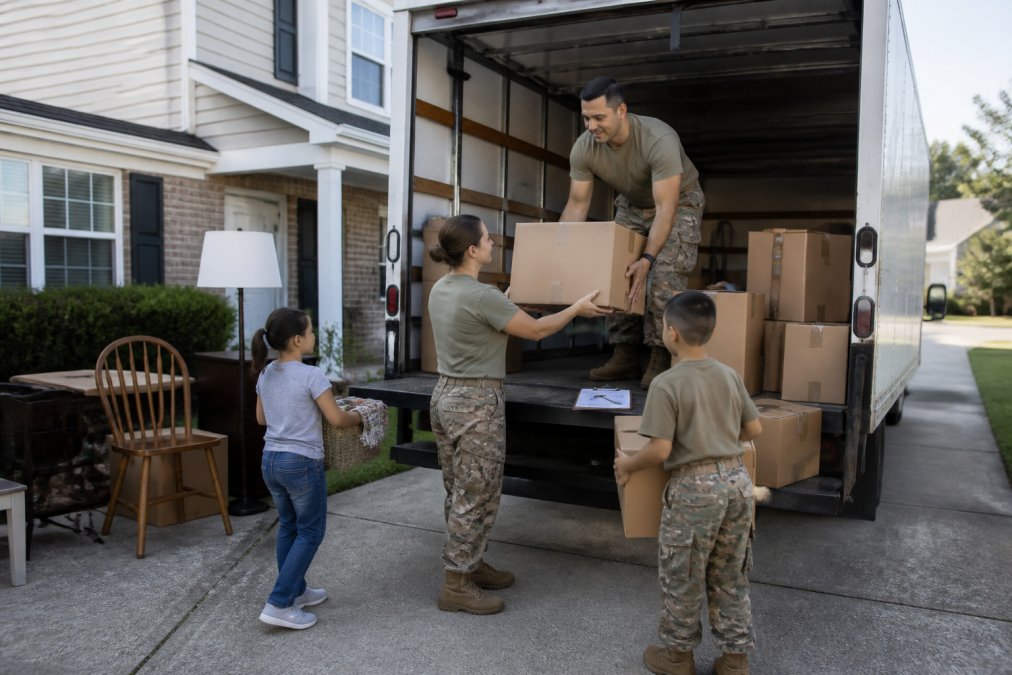
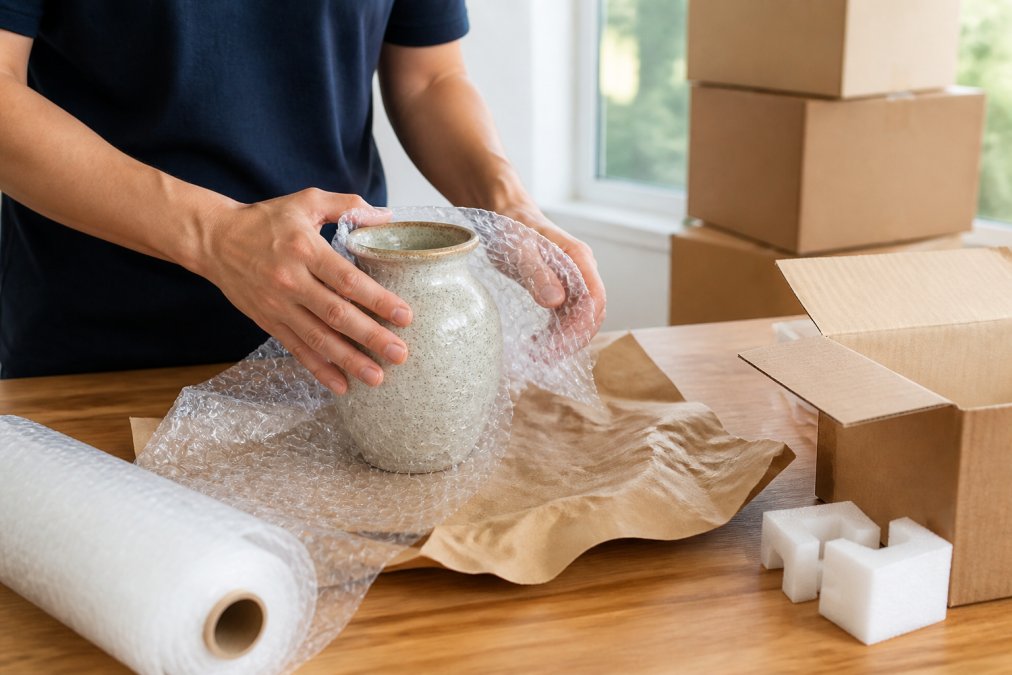
Professional packing services involve trained specialists who protect everything from everyday household items to irreplaceable fine art. At WePackYou, we assess your belongings, select appropriate materials, wrap items individually, and box everything with precision to prevent damage in transit.
Full professional packing includes inventorying items, selecting protective materials, wrapping fragile pieces, filling boxes strategically, and labeling everything. We use professional-grade supplies, acid-free tissue, bubble wrap, kraft paper, and sturdy boxes, plus custom wooden crates for valuable or delicate items.
Professional packers know that dishes, books, artwork, and electronics each require specific handling and protection protocols, preventing the damage DIY packing often causes.
Pro Tip Many households underestimate how much time packing actually takes. Professional packers typically complete a three-bedroom home in 2-3 days. Attempting this yourself often stretches across weeks while your life remains in limbo.
Full-Service Packing vs. Partial Packing Options
Full-service packing means our team handles everything; partial packing lets you handle certain items while professionals tackle fragile, valuable, or time-consuming categories. Choose based on your timeline, budget, and comfort level.
Full-service packing works best when overwhelmed by scope, on tight timelines, or when operational disruption must be minimized. You focus on logistics; we protect your belongings.
Partial packing appeals to those with budget constraints. You pack clothing and linens while professionals handle art, antiques, or electronics, controlling costs while protecting high-value items.
Service Level
Best For
Timeline
Involvement
Full-Service
Overwhelming moves, seniors, military PCS, corporate offices
2-4 days
Minimal, you observe and approve
Partial
Budget-conscious, specific high-value items, selective packing
3-7 days
You pack some categories
Unpacking Add-On
Complete white-glove experience
1-2 days after arrival
Zero involvement
Full-service packing eliminates anxiety and ensures consistent protection standards applied to every item.
Understanding Packing Services Cost
Pricing depends on home size, item quantity and type, complexity, and timeline. Understanding these variables helps you budget and compare quotes.
Labor Costs
Hourly labor rates depend on experience and market conditions. Specialized work like art crating commands premium rates.
Materials and Supplies
Materials are usually charged separately or bundled into a per-room fee. Standard materials include boxes, tape, kraft paper, bubble wrap, and tissue.
Specialty Services and Add-Ons
Minimum Hours and Project Fees
Most companies impose a minimum charge. Some offer flat-rate project pricing for common scenarios.
Getting a Detailed Quote
Request estimates broken down by labor, materials, and specialty services. A reputable quote specifies packers, timeline, materials included, and exclusions. Compare multiple providers; the cheapest option often cuts corners or adds surprise charges.
Watch Out Avoid quotes that seem unrealistically low, significantly below the market range for your home size and item complexity. Underbidding usually means the company will rush the job, use substandard materials, or add unexpected fees when the work takes longer than estimated. Request a written estimate with a not-to-exceed clause to protect yourself.
Factors That Increase Cost
Accumulated items, clutter, fragile collections, tight timelines, and difficult access increase costs. A well-organized, decluttered home packs more efficiently and costs less.
Total Cost Expectations
Custom Crating Services for High-Value Items
Custom wooden crates provide museum-grade protection for fine art, antiques, and high-value collectibles. WePackYou builds each crate specifically for the item, accounting for size, weight, fragility, and value.
Our specialists examine each piece, design a crate addressing specific risks, and construct it with quality wood, internal bracing, suspension systems, and protective padding tailored to the item.
Custom crating costs more but is essential for irreplaceable items. Gallery owners, collectors, and families protecting inherited pieces depend on museum-grade protection.
How to Prepare for Professional Packers
Declutter ruthlessly before packing day. Remove items you don’t need, clear pathways, and consolidate items by room so packers can move efficiently.
Communicate priorities clearly. Point out items requiring extra care, items to pack together, and fragile heirlooms or valuables so packers allocate time and materials appropriately.
Ensure packers can enter easily. Arrange building access in advance and plan pet care during packing.
Keep important documents, valuables, medications, and sentimental items separate from general packing.
Key Takeaway The single best preparation is a honest inventory of what you actually own. Many people discover during packing that they’ve been moving items they haven’t used in years. Decluttering before professional packers arrive saves money and reduces stress.
Booking Your Professional Packing Services
Booking professional packing services requires more than a phone call and a date. A methodical approach ensures you select the right provider, understand the full scope and cost, and avoid surprises on packing day.
Step 1: Gather Information About Your Move
Inventory your home’s size, number of rooms to pack, move date, specialty items, and any access challenges. This helps providers give accurate estimates.
Step 2: Request Estimates from Multiple Providers
Contact two to three companies for free estimates. In-home assessments are preferable so packers can see items and assess fragility. Be specific about your needs to help estimators allocate time and materials accurately.
Step 3: Evaluate the Estimate
A professional estimate should itemize labor, materials, specialty services, timeline, insurance, minimum charge, and not-to-exceed clause. Compare estimates side by side; a mid-range provider with strong reviews often delivers better value than the cheapest option. Red flags include vague descriptions, missing details, or refusal to provide written estimates.
Step 4: Verify Credentials and Insurance
Before booking, confirm the company’s credentials. Check whether they’re licensed and insured. Ask for proof of general liability insurance and workers’ compensation insurance. Request references from recent moves similar to yours, downsizing, fine art, corporate relocation, or whatever applies to your situation. Read online reviews on Google, Yelp, and the Better Business Bureau, paying attention to comments about communication, punctuality, and care with fragile items. A company with consistent 4.5+ star ratings and detailed positive reviews is a safer choice than one with few reviews or mixed feedback.
Step 5: Ask Critical Questions
Before finalizing your booking, clarify these points:
What happens if the job takes longer than estimated? Is there a not-to-exceed clause, or will you be charged for additional hours?
Are materials included in the quoted price, or are they billed separately? What quality of boxes and packing supplies will be used?
What’s your cancellation or rescheduling policy? If you need to move your packing date, what are the terms?
Do you offer unpacking services? If so, what’s the cost and timeline?
How do you handle fragile or high-value items? Ask specifically about their process for art, antiques, or electronics.
What’s your insurance claim process if something is damaged? Understand the limits and how to file a claim.
Will the same team pack and move my items, or do you hand off to a moving company? Continuity matters for accountability.
Can you accommodate my preferred packing dates and times? Confirm availability for your target dates, including evenings or weekends if needed.
Step 6: Finalize the Booking in Writing
Once you’ve selected a provider, request a written agreement that includes:
What’s included and what’s not (e.g., unpacking, transport, storage)
Insurance coverage details
Cancellation and rescheduling terms
Special instructions (e.g., “Custom crate the oil painting,” “Pack kitchen last”)
Contact information for the lead packer and the company
Don’t rely on verbal agreements. A written contract protects both you and the packing company by setting clear expectations.
Step 7: Prepare Your Home and Provide Access
Once your booking is confirmed, prepare your home for packing day. Declutter ruthlessly, remove items you don’t need, donate, sell, or discard them rather than paying to pack and transport them. Clear pathways through your home so packers can move efficiently. If you live in a building with security or restricted access, provide the packing company with building codes, parking information, and any required move-in permits or time windows.
Step 8: Communicate Priorities and Special Items
A few days before packing day, contact the lead packer to confirm any last-minute details. Point out items requiring extra care, family heirlooms, antiques, valuable electronics, or anything fragile. If you want specific items packed together or kept separate, mention it now. If you have items you’re not packing (important documents, medications, jewelry, valuables), clarify that these will stay with you. This communication ensures the team arrives fully prepared and allocates time and materials appropriately.
Key Takeaway The booking process is your opportunity to vet the company, understand the full cost, and set expectations. A thorough booking conversation, asking questions, reviewing the written estimate, and confirming details, prevents misunderstandings and ensures a smooth packing day.
What to Expect on Packing Day
Packing day begins with your team arriving at your home at the agreed time. The lead packer will typically do a quick walkthrough to confirm what needs packing and answer any last-minute questions. Then the real work begins, systematically moving through your home, room by room, wrapping and boxing items with practiced efficiency.
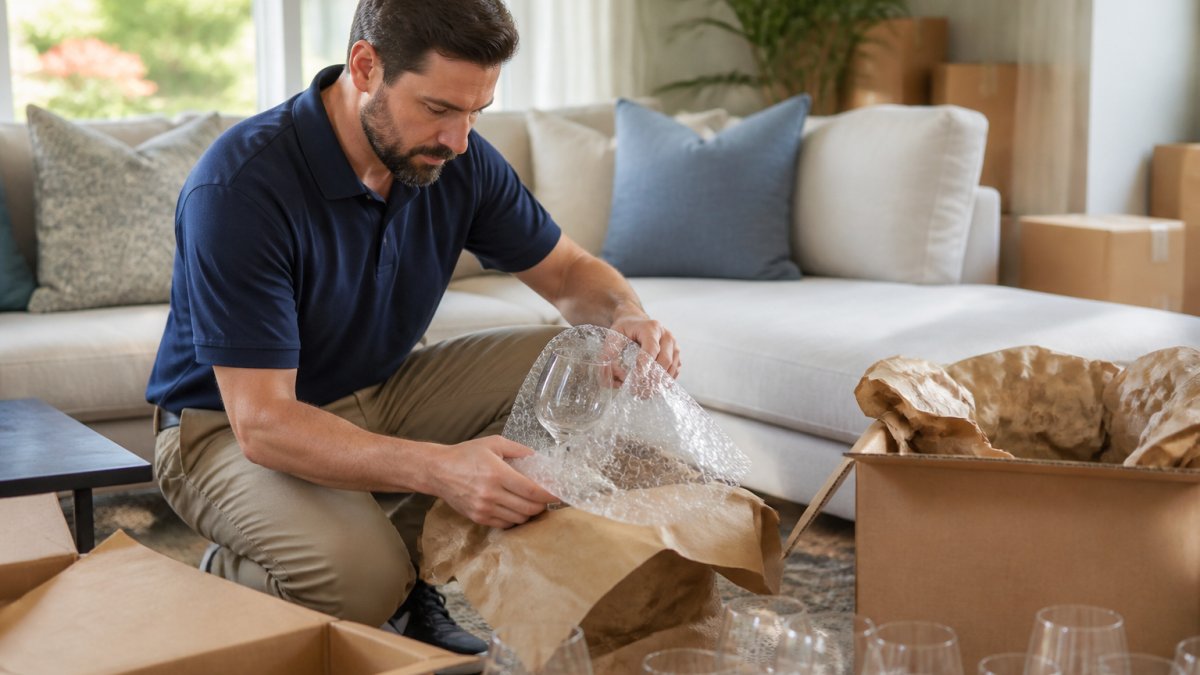
Professional packing specialist carefully wrapping delicate glassware with protective bubble wrap and kraft paper in a residential living room with natural window lighting
You’ll notice the organization immediately. Packers work in coordinated teams, one wrapping, one boxing, one labeling. They use assembly-line efficiency to move quickly without sacrificing care. Your role is simply to stay out of the way and answer questions if they arise. Most people find it oddly satisfying to watch professionals transform a chaotic home into organized, labeled boxes.
Professional packers work methodically. They don’t rush. A bedroom might take 2-3 hours depending on contents. A kitchen takes longer because dishes and glassware require individual wrapping. As boxes fill, they’re labeled with the room and contents, making unpacking infinitely easier.
By day’s end, your home will be transformed into a sea of boxes, all organized and ready for transport. Some items may still be in the process of being crated if you’ve chosen custom crating for valuables. Your packers will explain what’s ready to move and what still requires attention.
Booking professional packing services in the DC area transforms a stressful, time-consuming process into a managed, protected transition. Whether you’re downsizing after decades in one home, relocating fine art, coordinating a military PCS move, or managing a corporate office relocation, professional packing protects what matters most while freeing you to focus on the bigger picture. WePackYou specializes exclusively in expert packing with trained specialists, professional-grade materials, and custom crating for high-value items, all fully insured and scheduled around your timeline. Request a free estimate from WePackYou to see how professional packing can simplify your move and protect your belongings.
Frequently Asked Questions
What do professional packing services include?
Professional packing services typically include careful assessment of your belongings, selection of appropriate packing materials, systematic wrapping and boxing of items, and placement in your moving truck or storage unit. Full-service packing covers everything from start to finish. Partial packing lets you handle certain items yourself while professionals tackle fragile or high-value pieces. Most professional packing services include use of quality boxes, tape, padding, and protective wrapping. Specialty services like custom crating for fine art, antiques, or oversized furniture are often available as add-ons for items requiring museum-quality protection.
How much do professional packing services cost?
Professional packing services cost depends on several factors: the volume of items to pack, whether you choose full-service or partial packing, the complexity of your belongings, and whether specialty services like custom crating are needed. Hourly rates vary by provider, and many companies offer free estimates to assess your specific needs. Pricing also reflects the quality of materials used and the expertise of your packing team. For an accurate quote tailored to your move, contact local providers directly to discuss your requirements and receive a detailed estimate based on your situation.
How far in advance should I book professional packers?
Book professional packing services at least 2-4 weeks before your move to secure your preferred dates and times. During peak moving seasons (spring and summer), demand is higher, so booking earlier increases your options. If you have a tight timeline, many professional packing companies offer expedited scheduling, including evenings and weekends. For military PCS moves or corporate relocations with strict deadlines, contact providers immediately, some specialize in rapid turnarounds. Confirm availability as soon as you know your moving date to ensure your packing team can accommodate your schedule.
Can I hire packers without hiring movers?
Yes, you can absolutely hire professional packers separately from movers. Many households, fine art collectors, and businesses choose packing-only services to protect valuable items while arranging their own transportation or using a different moving company. This approach gives you control over which company handles packing and which handles the actual move. Some professional packing companies provide referrals to vetted moving partners if you need help with transport after packing is complete. This flexibility is especially valuable for high-value collections, corporate moves, or situations where you want specialized packing expertise independent of your moving logistics.
A PCS packing timeline is a week-by-week plan that maps every packing task to your orders date and your pack-out day, so nothing gets left to the last 48 hours.
Families who start early stay calm. Families who wait until pack-out week lose sleep, money, and sometimes irreplaceable items.
Here is what most guides get wrong: they list tasks without tying them to your actual orders date. A generic checklist cannot tell you when to start.
Below, we break the move into an 8-week countdown you can shift forward or backward to fit your situation.
Your Military PCS Move Checklist: 8 to 10 Weeks Out
Your military PCS move checklist should start the week your orders arrive, not the week you feel ready. Eight to ten weeks gives you room to sort, declutter, and schedule without panic.
Use this countdown as your master schedule. If your window is shorter, compress weeks, do not skip them.
Weeks 8-7 (orders in hand)
Confirm your orders and report date in writing; scan a copy to your phone and cloud storage
Contact your Transportation Management Office (TMO) to start the move request
Decide between a government-arranged move and a personally procured move (PPM)
Start a PCS binder for orders, inventory sheets, weight tickets, and receipts
Open a dedicated folder for every receipt, you will need them for claims and reimbursement
Weeks 6-5 (planning locked)
Set your pack-out and pickup dates with the moving office
Request an estimated shipment weight and compare it against your weight allowance
Notify your landlord, utilities, and schools of your departure
Begin decluttering one room at a time (see the room-by-room section below)
Weeks 4-3 (sorting and scheduling)
Schedule donation pickups and dumpster or haul-away service
Confirm travel arrangements, lodging, and pet or child care for pack-out days
Photograph high-value items and gather serial numbers, appraisals, and receipts
Set aside anything you are moving yourself so movers do not pack it
Weeks 2-1 (final prep)
Confirm the crew’s arrival window and any access needs (parking, elevator, gate codes)
Pack your essentials box and keep it in your car
Empty and defrost the fridge and freezer
Do a final walkthrough of closets, garage, and storage areas
The official move.mil guidance on scheduling a PCS move walks through the request process step by step.
Deadlines That Matter Most After Orders Arrive
Two deadlines drive everything else: your pack-out date and your final out-processing date. Miss either one and the whole schedule bends.
Most families have roughly 8 to 10 weeks between orders and pack-out. That window shrinks fast if you travel, take leave, or wait on housing.
Adjusting the Timeline for Different Situations
A single countdown does not fit every move. Shift the schedule like this:
Short-notice orders (under 4 weeks): Call TMO the same day, book professional packers immediately, and cut decluttering to a single pass, pack, donate, discard only.
Overseas moves: Add 2-3 weeks for passport and visa checks, appliance voltage questions, and a longer shipment transit window. Keep a separate list of items that cannot ship.
Temporary lodging or a gap between homes: Plan a “storage” pile and a “with me now” pile. The essentials box becomes your household for weeks, not days.
Moves with children or pets: Add buffer days around pack-out for sitters, boarding, and school transfers, and keep comfort items out of the shipment.
Watch Out Do not wait for TMO to call you back before you start sorting. A common mistake is treating the move request as the starting gun. By the time dates are confirmed, you may have only three or four weeks left to pack.
What to Pack First for a PCS Move: Room-by-Room Priorities
The best answer to what to pack first for a PCS move is simple: pack the rooms you use least, and leave the rooms you live in until the end.
A military family in a living room sorting items into three piles: boxes labeled pack, bags for donation, and a trash pile. Here is the order that works: 1. **Storage rooms, attics, and garages.** Seasonal items, holiday decor, and things you have not touched in a year. 2. **Guest rooms and formal spaces.** Furniture and decor you can live without for a few weeks. 3. **Home offices and hobby rooms.** Books, files, and equipment. 4. **Kitchen items.** Keep one set of dishes, one pot, and one pan out. 5. **Bedrooms.** Pack clothing you are not wearing this season. 6. **Bathrooms and daily essentials.** These go last, and some go in your car. Sort every pile into four groups: pack, store, donate, discard. Movers charge by weight, so every box you leave behind saves you money. ## PCS Essentials Box Checklist: Your First-Night Kit A PCS essentials box is the one container that stays with you, not the movers. It holds everything your family needs for the first 24 hours in a new home. Pack these items yourself: – [
Important documents: orders, birth certificates, marriage license, Social Security cards
Medications and a basic first aid kit
Phone chargers and a power strip
Toothbrushes, soap, and towels
A change of clothes for each family member
Keep this box in your car. Do not let it go on the truck.
Pro Tip Label the essentials box with bright tape on all four sides. On a chaotic moving day, movers stack boxes fast, and a clearly marked box is the one you can find without opening twenty others.
Preparing for Pack-Out Day and Protecting Your Shipment
Pack-out day runs best when your home is ready before the crew arrives.
Do these things the night before:
Unplug electronics and coil the cords
Remove wall art and mirrors, or point them out to the crew
Set aside valuables, jewelry, and cash
Put pets in a closed room or with a sitter
Park cars away from the loading zone
On pack-out day itself, walk the house with the crew lead. Point out fragile items, antiques, and anything needing custom crating.
That sheet is your proof if something arrives damaged. Check that every high-value item is listed by name, not just “box.”
Our trained specialists use professional-grade materials and custom wooden crating for oversized and fragile pieces, and every packing job is fully insured.
PCS Moving Day Checklist: Final Walkthrough and Inventory
Your PCS moving day checklist should take about an hour and cover every room, closet, and outdoor space. Do it after the truck is loaded but before it pulls away. This is also the moment to lock down the paperwork that protects your shipment.
Run through this list:
Check every closet, cabinet, and drawer for missed items
Look in the attic, garage, and shed
Confirm the inventory sheet matches what you see loaded
Note the shipment weight estimate and ask for a copy
Photograph the loaded truck and the inventory paperwork
Documenting Condition Before the Truck Leaves
The inventory sheet is only as good as the detail behind it. Before the truck pulls away:
Photograph each high-value item from at least two angles, including any existing scratches or dents
Write down serial numbers for electronics, instruments, and appliances
Note the condition code the crew uses for each line (most inventories mark items as scratched, dented, or damaged at origin)
Ask the crew lead to initial any item you flagged as fragile or pre-damaged
Keep your copy of the inventory in your PCS binder, not in a box on the truck
If something arrives missing or damaged, you file a claim through your moving office or the carrier’s claims process. The photos, serial numbers, and signed inventory are what make a claim stand up. Report damage as soon as you notice it, waiting can weaken a claim.
Shipment Weight and Personally Procured Moves
Weight drives cost and reimbursement, so plan it before pack-out, not after.
Know your allowance. Your branch and rank set a maximum shipment weight. Ask your transportation office for your specific limit in writing.
Estimate before you pack. A common rule of thumb is roughly 1,000 pounds per furnished room, but the only accurate number comes from a certified scale.
Weigh empty and loaded. For a PPM, get weight tickets at a certified scale both before loading and after. Keep every ticket, missing one can cost you reimbursement.
Compare the math. A PPM can pay more than a government-arranged move if you do the work, but you carry the risk of damage and the cost of the truck, fuel, and labor up front.
Document everything. Receipts for truck rental, fuel, and supplies are part of the reimbursement packet.
A common pattern is that families underestimate weight by 20-30% until they see the scale ticket. Decluttering before pack-out is the single biggest lever on both weight and cost.
Key Takeaway Sign nothing until you have walked the house, confirmed the inventory is complete, and photographed anything of value. The inventory sheet and your weight tickets are the two documents that decide what you get paid and what you can claim.
When to Hire Professional Packing Help for Your PCS
Hire professional packing help when your timeline is short, your home holds high-value items, or your family simply cannot add one more task. Many military families find that packing is the job worth outsourcing.
Someone in the family is downsizing or needs extra patience
Both adults are working full schedules
You want the job insured from the first box to the last
WePackYou packs homes, offices, and art collections across the DC Metro area, with flexible scheduling that includes evenings and weekends. We also refer you to vetted moving professionals when you need the truck and the driving handled too.
Conclusion
A PCS move compresses a hundred decisions into a few short weeks, and packing is where most of them land. Start with your orders, build the countdown backward from pack-out, and sort one room at a time.
If the timeline feels too tight, or your home holds pieces you cannot risk, WePackYou can take packing off your plate.
Get a free quote from WePackYou and move with one less thing to worry about.
Frequently Asked Questions
When should I start packing for a military PCS move?
Start the sorting and decluttering process 8 to 10 weeks before your pack-out date. This gives you time to decide what to store, donate, or discard without rushing. Begin packing non-essential items like seasonal decor and off-season clothing around the 4 to 6 week mark. Keep daily essentials accessible until the final week. If you received short-notice orders, focus first on the military PCS move checklist tasks that have hard deadlines, such as scheduling your move with TMO.
What should I pack first for a PCS move?
Start with items you will not need before moving day: off-season clothing, holiday decorations, books, and rarely used kitchen gadgets. Next, tackle room-by-room priorities, beginning with the garage, storage closets, and guest rooms. Leave the kitchen, bathrooms, and bedrooms for last since you use those daily. Label every box with its destination room and a brief contents list. This approach keeps your PCS packing timeline on track and reduces stress during the final week.
What should I put in a PCS essentials box?
Your essentials box should cover the first 24 to 48 hours after arrival. Include a change of clothes for each family member, toiletries, medications, phone chargers, important documents like birth certificates and Social Security cards, basic cleaning supplies, toilet paper, and non-perishable snacks. Add children’s comfort items, a small toolkit, and shower curtains. Keep this box with you rather than on the moving truck. A solid PCS essentials box checklist prevents a frantic search through dozens of labeled boxes on your first night.
How do I prepare for pack-out day with movers?
Clear walkways, remove valuables and important documents, and designate a room or area the movers should not pack. Take photos of high-value items before they are wrapped. Confirm your shipment weight allowance and ask for a copy of the inventory sheet as items are logged. On pack-out day, stay available to answer questions but let the crew work. If you hired professional packers, verify they use proper materials for fragile items. Review the inventory against your own list before signing anything.
What Professional Packing Services for Seniors Downsizing Include
Professional packing services for seniors downsizing handle the physical work of sorting, wrapping, boxing, and labeling a lifetime of belongings so the move itself stops being the hardest part. At WePackYou, we treat that as a care job first and a logistics job second.
The goal is a secure transition, not a fast one. Patience is the operating principle.
Packing, Unpacking, and Organizing Options
For a downsizing move, the middle option usually fits best. Seniors often need help deciding what travels and help settling it back into a smaller space. Unpacking is where the new home starts to feel like home.
Pro Tip Ask for a labeled floor plan before packing day. When boxes are numbered by room and marked “kitchen, open first,” the first night in a new place stops feeling chaotic.
How to Downsize Before a Move: A Step-by-Step Approach
Downsizing works best when it starts weeks before the first box, not the day the truck arrives. Work one room at a time, and never attempt the whole house in a weekend.
Pick a starting room with the least emotional weight, like a guest room or garage.
Set a weekly target. One closet or one cabinet per session is realistic.
Measure the new space. Note closet depth, kitchen storage, and any stairs.
Sort into four piles: keep, donate, sell, discard.
Photograph sentimental items you cannot take, then pass them on.
Book the packers once the keep pile is roughly defined.
The order matters. Sorting before packing means movers only handle what is actually moving, which lowers cost and shortens moving day.
Deciding What to Keep, Donate, Sell, or Discard
The keep pile should be built around use, not memory. A practical rule: if an item has not been used or displayed in two years, it belongs in one of the other three piles.
What most guides miss is the fifth pile: decide later. Give yourself one small box for genuinely undecidable items and revisit it after the move. Forcing a decision on everything at once is what exhausts people.
Your Senior Move Planning Checklist for a Smooth Transition
A senior move planning checklist keeps the emotional and physical load manageable by spreading tasks across weeks. Start eight weeks out for a house, four weeks for an apartment.
Confirm the move date and building access rules
Measure doorways, elevators, and stairwells
Notify doctors, pharmacy, insurance, and utilities
Forward mail and update your address
Book packing services and confirm insurance coverage
Arrange a donation pickup for the week before the move
Pack a first-night box: medications, bedding, toiletries, chargers
Confirm parking or loading permits for moving day
Family and caregiver coordination belongs on this list too. Assign one person to be the point of contact so the senior is not fielding every question.
A Practical Packing Timeline for Seniors
The timeline below assumes professional packers handle the heavy lifting. Adjust it if you are packing yourself.
Timeframe
Task
8 weeks out
Declutter, measure, book packers
6 weeks out
Sort keep/donate/sell/discard room by room
4 weeks out
Schedule donation and junk removal pickups
2 weeks out
Pack off-season items and decor
1 week out
Confirm move logistics and insurance
Moving day
Packers handle the rest; you direct placement
Watch Out Do not leave medication, financial documents, jewelry, or keys to the packers. Keep those with you in a personal bag. Items that travel in your own car are the ones you cannot replace.
Packing Fragile Items for Long Distance: Protecting What Matters Most
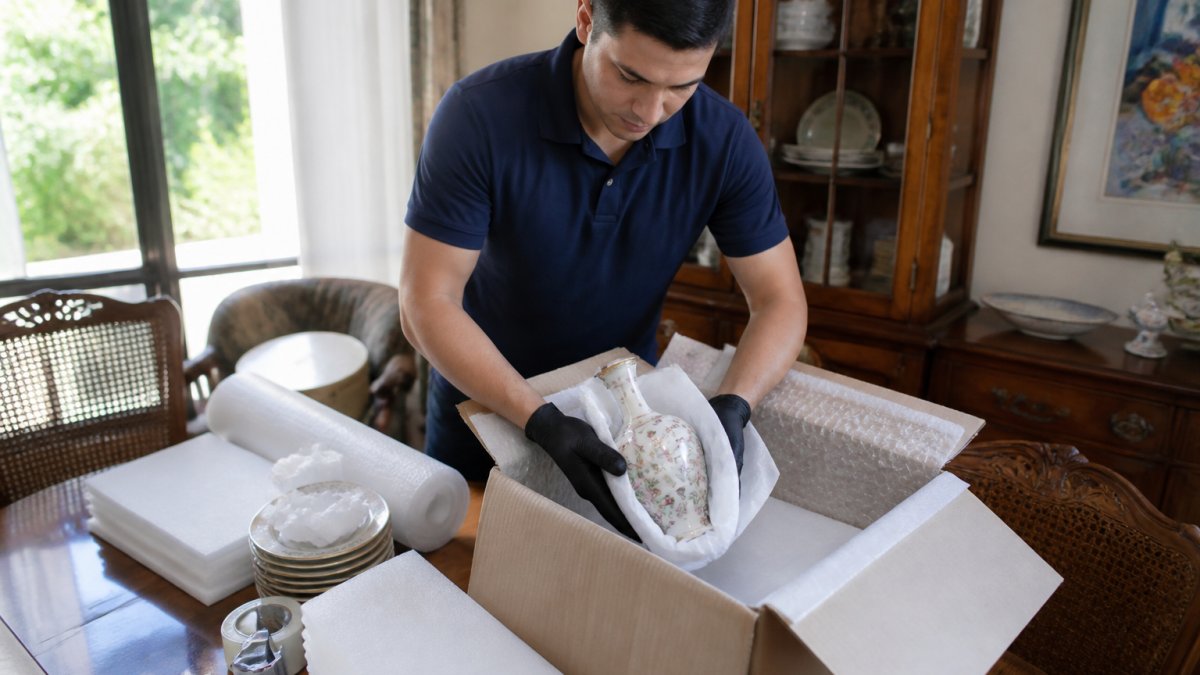
A professional packer in gloves carefully wrapping a delicate porcelain vase in tissue paper and foam, lowering it into a lined cardboard box on a dining table, packing supplies spread nearby in a bright sunlit home
The Box-Within-a-Box Method
For anything breakable, the standard technique is a box inside a box:
Wrap the item individually in tissue or bubble wrap, then tape the wrap so it does not shift.
Line a small box with foam or crumpled paper on all six sides.
Place the wrapped item so it cannot touch the box walls.
Seal the small box, then place it inside a larger box with at least two inches of cushioning on every side.
Label the outer box “FRAGILE” on the top and two sides, and mark which way is up.
For high-value pieces, custom-built wooden crating is the safer route. A crate holds its shape under stacking pressure, which a cardboard box cannot do.
Protecting Heirlooms, Medications, and Documents
This is where a senior move differs from a standard move, and where most guides stop short. Some items should never go in the moving truck at all:
Medications: Keep a full supply in a personal bag, not a packed box. A move can stretch across a day or more, and a missed dose is a health risk, not an inconvenience.
Financial and legal documents: Wills, deeds, powers of attorney, insurance policies, and passports belong with you. If a box is delayed or lost, these are the hardest to replace.
Jewelry and small valuables: Carry them personally. Do not leave them for the packers, even with a written inventory.
Keys and access items: Car keys, house keys, mailbox keys, and building fobs stay on your person.
For heirlooms that do travel, photograph each item before packing and note it on a written inventory. A chipped teacup from a grandmother’s set is not replaceable at any price, but a photo and a record help with an insurance claim if the worst happens.
Labeling and Inventory That Survive the Move
Label every fragile box on the top and two sides, and keep a written inventory. If something does arrive damaged, that list is what an insurance claim is built on. Number each box and match it to the inventory sheet, so a missing box is obvious the moment unloading starts.
Best For Seniors moving long distance with antiques, artwork, or heirloom china that would be impossible to replace.
Key Takeaway Treat medications, documents, jewelry, and keys as carry-with-you items, never as packed items. Everything else can be replaced; those four cannot.
Packing and Organizing Services for Seniors: What to Look For
The right provider specializes in packing rather than treating it as an add-on to moving. Specialists bring better materials, faster hands, and fewer broken items.
Written insurance coverage for the packing work itself
Experience with seniors, including patience and flexible pacing
A written estimate that itemizes packing separately from transport
Ask directly how they handle a fragile item and who pays if it breaks. A confident, specific answer is a good sign.
Credentials, Insurance, and Vetting Professional Packers
Vetting professional packers comes down to three checks: licensing and registration, insurance, and references. Ask for a certificate of insurance and confirm what it covers, because packing coverage and moving coverage are often separate policies.
Then read reviews for patterns, not star ratings. A single complaint about a late arrival means little. Repeated notes about rushed packing or damaged boxes mean a lot.
Insurance is the line between a stressful move and a financial loss. Get the coverage details in writing before packing day, and confirm whether the policy covers packing, transit, or both.
What Professional Packing Services for Seniors Downsizing Cost
Pricing for professional packing services for seniors downsizing depends on home size, how much is being packed, how much sorting help you need, and how far the move runs. There is no single flat rate, and any quote given over the phone without a walkthrough is a guess.
What Actually Drives the Price Up or Down
Packing costs are not random. They move with a predictable set of factors:
Factor
Effect on Cost
Fragile items (china, glass, art)
Higher, more materials and slower hands
Custom wooden crating
Higher, built to order, not off the shelf
Stairs, long carries, elevator reservations
Higher, more labor hours per box
Already decluttered before packing day
Lower, packers only touch what is moving
Off-season packing done in advance
Lower, spreads labor across visits
Full unpacking at destination
Higher, adds a second on-site phase
Questions to Ask Before You Sign
A written, itemized estimate is the only number worth trusting. Ask these before you commit:
Is packing priced separately from transport, or bundled?
Does the estimate include materials (boxes, tape, foam, crating), or are those billed on top?
What happens if the job runs past the quoted hours?
Is there a minimum crew size or minimum charge?
Are stairs, long carries, or elevator reservations surcharges?
Who pays if a packed item arrives damaged, and what is the claims process?
Watch Out Be cautious with any estimate that arrives before someone has seen the home. Packing scope is impossible to judge from a phone call, and vague quotes are where surprise charges come from.
The honest answer to “what will this cost” is: get a written, itemized estimate after an on-site walkthrough. WePackYou provides free quotes.
How to Compare Two Estimates Fairly
Two quotes can look identical on the bottom line and cover completely different work. Put them side by side on these points:
Scope: Does each quote include sorting help, or only packing the keep pile?
Materials: Are boxes, tape, bubble wrap, and crating included or billed separately?
Insurance: Is packing coverage included, or is it a separate policy?
Timeline: How many visits, and how many crew members per visit?
The lowest number is rarely the lowest total cost once materials, surcharges, and unpacking are added back in.
Conclusion
Downsizing asks a senior to sort through decades of belongings while managing the physical strain of packing and the emotional weight of letting go. That is a lot to carry alone, and it is exactly the work a packing team should absorb. WePackYou sends trained specialists who pack with care, build custom crates for fragile and oversized pieces, work around your schedule including evenings and weekends, and carry full insurance on every job. Get a free quote from WePackYou and let our team handle the boxes while you focus on the next chapter.
Frequently Asked Questions
What do professional packing services for seniors include?
Professional packing services for seniors typically cover sorting and organizing belongings, wrapping fragile and sentimental items, providing packing supplies, labeling boxes by room, and loading items for transport. Some providers also offer unpacking and home setup. WePackYou specializes exclusively in packing, with trained specialists who use professional-grade materials and custom crating for oversized or fragile pieces. Services can be tailored to your timeline and schedule, including evenings and weekends.
How do you help a senior downsize before a move?
Downsizing help starts with a room-by-room assessment to decide what to keep, donate, sell, or discard. Professional packers can assist with sorting, then pack only the items moving to the new home. A senior move planning checklist keeps the process organized, and a practical packing timeline spreads the work over several weeks. For seniors feeling overwhelmed, compassionate packers work at a comfortable pace and coordinate with family members to make decisions easier.
How much do professional packing services cost?
Packing costs depend on the size of your home, the volume of items, the complexity of packing fragile or oversized pieces, and your timeline. Some providers publish hourly rates or minimums, but many offer custom quotes after an in-home assessment. WePackYou does not list fixed prices because every job is different. For current rates and a free quote, contact WePackYou directly through their website. Always confirm what is included, such as supplies, insurance, and unpacking.
How should families decide what a senior keeps when downsizing?
Start by measuring the new space and identifying furniture that fits. Then sort belongings into four categories: keep, donate, sell, or discard. Sentimental items deserve special attention; if a senior wants to keep them, professional packers can wrap and protect them for transport. Family members can help by taking photos of items that are hard to part with, or by storing a few boxes. Involving the senior in decisions preserves dignity and reduces stress.
The 10 Best Materials for Packing Antique Furniture
Packing antique furniture means wrapping, cushioning, and securing aged wood, veneer, upholstery, and finish so a piece survives a move without a new scratch, chip, or crack. At WePackYou, we pack antique furniture for collectors, galleries, and families across the DC Metro area. Get the materials right and most damage never happens; get them wrong and one roll of the wrong tape can lift a hundred-year-old finish.
How the Materials Were Ranked
We ranked these materials on protection level, finish safety, cost, and reusability. Finish safety carries the most weight: antique wood, shellac, lacquer, and gilding react badly to certain plastics and adhesives, so a material that cushions well but damages the surface ranks lower.
Watch Out Never let standard masking tape, duct tape, or packing tape touch bare antique wood. The adhesive bonds to shellac and lacquer, and removing it can pull the finish off in patches. Tape goes on the wrapping, never on the piece.
Quick Comparison of the 10 Materials
Material
Protects Against
Best For
Reusable
Moving blankets
Impact, scratches
Large furniture, tabletops
Yes
Bubble wrap
Impact, vibration
Carved details, fragile parts
Sometimes
Packing paper
Scratches, dust
Direct-contact wrapping
No
Foam sheets
Impact, edges
Corners, thin panels
Yes
Cardboard boxes and sheets
Impact, punctures
Structure, glass, panels
Yes
Plastic wrap
Dust, moisture, shifting
Holding covers in place
No
Packing tape
Opening, shifting
Sealing boxes and wraps
No
1. Moving Blankets
Moving blankets are the first line of defense for large antique furniture, absorbing impact and stopping scratches on tabletops, dressers, and cabinet fronts.
Best for: sofas, armoires, dining tables, headboards
Pair with: plastic wrap to hold the blanket in place
Reusable: yes, for years
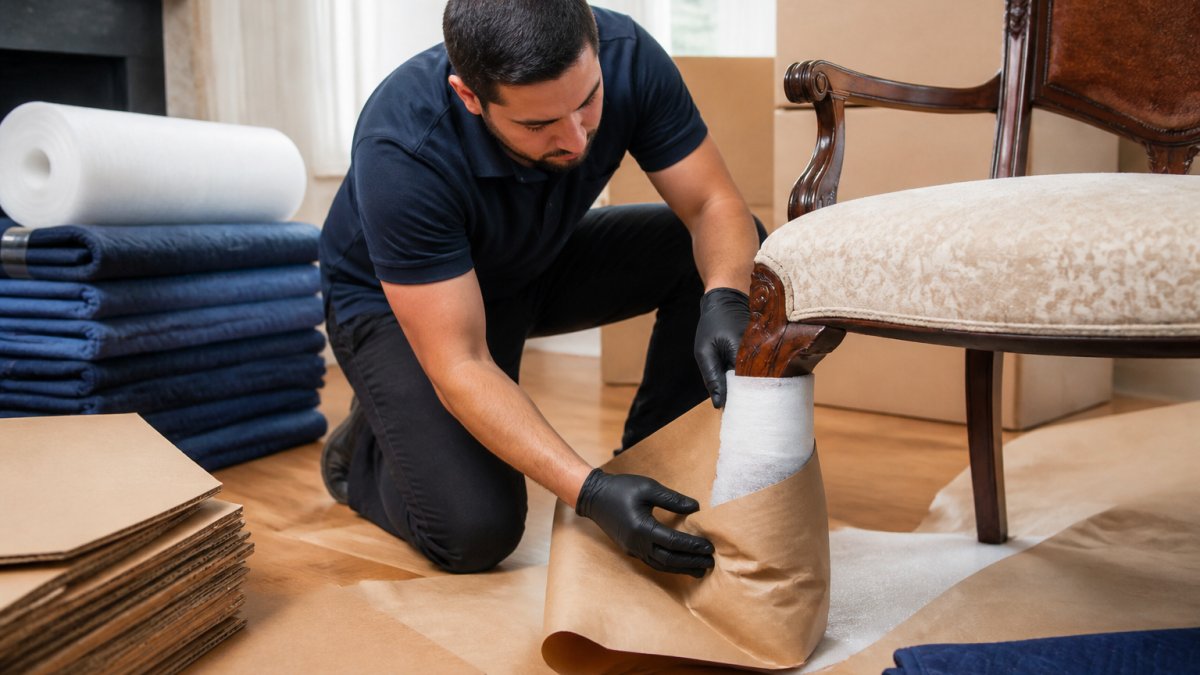
A professional packer in gloves carefully wrapping the carved leg of an antique wooden chair with packing paper and foam, surrounded by moving blankets and cardboard sheets in a bright home interior
2. Bubble Wrap
Bubble wrap cushions carved details, handles, and fragile trim that blankets can’t reach. Small bubbles work better than large ones because they conform to curves and moldings; wrap two to three layers around protruding parts. The catch: bubble wrap can leave marks on some finishes if left in direct contact for months, so use packing paper as a barrier between the bubbles and bare wood.
Best for: carved legs, finials, drawer pulls, glass inserts
Avoid: direct contact with shellac or gilded surfaces for long storage
Reusable: often, if the bubbles stay intact
3. Packing Paper
Packing paper is the safe direct-contact wrap for antique surfaces, and it’s acid-free in the better grades, which matters for long-term storage. Crumple it to fill empty spaces inside drawers and around joints. It’s soft, cheap, and forgiving: it won’t scratch and won’t react with old finishes.
Best for: first layer on bare wood, wrapping small parts
Also use for: filling gaps in boxes and drawers
Reusable: no, but inexpensive
4. Foam Sheets and Foam Rubber
Foam sheets and foam rubber protect corners and edges, the spots that take the hardest hits. Cut them to size and tape them over each corner before wrapping the whole piece; thin foam also sits between stacked items and under glass panels. Use soft foam for delicate trim and firmer foam for heavy corners.
Best for: corner protection, edge padding, glass and mirror backing
Pair with: cardboard sheets for rigid backing
Reusable: yes
5. Cardboard Boxes and Cardboard Sheets
Cardboard boxes and sheets give structure. Sturdy double-wall cardboard holds small antiques, hardware, and detached parts, while cardboard sheets slide behind glass, over tabletops, and between stacked furniture to stop punctures. Double-wall and triple-wall resist crushing better than single-wall, which is what you want under anything heavy.
Best for: boxed parts, glass, flat panels, stacking separators
Choose: double-wall or triple-wall for heavy or fragile loads
Reusable: yes, if kept dry
6. Plastic Wrap
Plastic wrap holds blankets, paper, and foam in place and keeps dust and moisture off upholstery. Stretch it snug, but never directly against bare antique wood, since plastic can trap moisture and stick to some finishes over time. Treat it as the outer seal, not the inner layer.
Best for: securing covers, protecting upholstery, weatherproofing
Never: direct contact with bare wood or gilding
Reusable: no
7. Packing Tape
Packing tape seals boxes and secures wraps, on the outside of the wrapping only. A good tape holds under weight and doesn’t peel in transit.
Best for: sealing boxes, closing wraps, labeling
Never: touching bare antique surfaces
Reusable: no
What Else Belongs in Your Kit
Two more materials round out a serious antique packing kit: corner protectors and wooden pallets or crates for the heaviest pieces. Corner protectors are pre-formed caps that lock onto furniture corners, adding a rigid shell where impact is most likely.
Corner protectors: rigid impact shield for each corner
Wooden pallets: keeps furniture off damp floors
Custom crates: for oversized, fragile, or high-value antiques
If you’d rather not source all of this yourself, our team at WePackYou brings professional-grade materials and custom-built wooden crating.
How to Pack Antique Furniture for Moving
Packing antique furniture for moving comes down to layers in the right order, and the order changes depending on what the piece is made of. Skip a layer and the finish is exposed; add them in sequence and the surface stays untouched.
The universal layer order (inside to outside):
Clean and dry the piece completely. Dust under a wrap becomes an abrasive that grinds into a finish in transit.
Remove drawers, hardware, shelves, and detached parts. Bag screws and escutcheons in a labeled zip-top bag and tape the bag to the piece, not to a box that can be separated.
Wrap bare wood, gilding, and inlay in acid-free packing paper first. This is the barrier layer. Nothing plastic should touch the finish.
Add foam to corners and edges. Corners take the hardest hits and are the most expensive to repair.
Cushion carved details, finials, and applied molding with small-bubble bubble wrap over the paper.
Cover large flat surfaces with a moving blanket.
Secure everything with stretch plastic wrap on the outside only, never against bare wood.
Slide cardboard sheets between stacked items and behind glass.
Box small parts in double-wall cardboard and seal with packing tape on the box, not the furniture.
Label every box and crate by room and contents.
That sequence works for a generic dresser. Antiques are not generic, so here is how the method changes by furniture type.
Cabinets, Chests, and Case Goods
Remove every drawer and pack each one separately so its weight does not stress the case during lifting. Pad the drawer runners and the inside of the carcass with packing paper, then close the doors and secure them with a strip of stretch wrap around the whole case, not tape on the door faces.
Remove the legs if they detach, and wrap each one individually in paper and foam. If they don’t, pad the apron and the underside of the top, then blanket the whole table. Marble and stone tops should come off and travel vertically in their own padded crate or box, never stacked flat under other weight.
Chairs
Chairs are the most-repaired antique in transit because the legs and stretchers take side loads. Wrap each leg in paper and foam, pad the back splat and any caning or rush seat with paper (never plastic directly on cane, which can soften and mold), and blanket the whole chair. Stack chairs back-to-back with a blanket or foam sheet between each one, never seat-to-seat.
Mirrors and Glass
Gilded and carved frames are the fragile part, not the glass. Tape an X of painter’s tape across the glass to hold shards in place if it breaks, then wrap the frame in paper, pad the corners with foam, and face the mirror against a rigid cardboard sheet or into a custom crate.
Upholstered Pieces
Fabric is vulnerable to dirt, snags, and moisture, not impact. Wrap upholstery in stretch plastic or a breathable furniture cover, then blanket the piece. Never seal an upholstered antique in plastic for long-term storage, because trapped moisture feeds mildew in the batting and frame.
Furniture With Removable or Fragile Components
Marble tops, glass shelves, mirrors, brass hardware, and inlaid panels should all be removed and packed independently, labeled, and kept with their piece. A detached marble top in its own box is far safer than one left on the console.
Key Takeaway Layer order is paper first, foam at corners, bubble wrap over paper on details, blanket over the whole piece, and plastic wrap on the outside only. Then adjust the method to the furniture type, because a chair, a mirror, and a marble-topped console fail in three different ways.
How to Protect Antique Furniture During a Move
Protecting antique furniture during a move means controlling three risks: impact, moisture, and contact damage. Most guides cover impact and stop there, but for antiques, moisture and contact damage are what actually ruin pieces, and both come from the materials you choose, not the movers.
Contact Damage: What Should Never Touch an Antique Surface
Antique finishes are not modern catalyzed coatings. Shellac, lacquer, varnish, and gilding are softer, more porous, and more reactive than new-furniture finishes, and some common packing materials bond to them or leave marks.
Standard masking, duct, and packing tape: the adhesive bonds to shellac and lacquer and can pull the finish off in patches on removal. Tape goes on the wrapping, never on the piece.
Stretch plastic wrap in direct contact: plasticizers in some films can transfer marks to a finish, and the wrap can trap moisture against the wood. Use it as the outer seal only.
Bubble wrap in long direct contact: most practitioners find that bubble wrap left against a finish for months can leave a faint pattern or trap condensation. Paper goes between the bubbles and the wood.
Safe barrier layers to use instead: acid-free packing paper, unbleached tissue, and clean cotton or muslin sheeting. These are the materials that can touch a bare antique surface without reacting with it.
Moisture, Humidity, and Condensation
Wood moves with humidity. An antique acclimated to a dry, climate-controlled room can crack, warp, or lift veneer in a humid truck or damp storage unit, and packing materials either slow that exchange or accelerate it.
Plastic traps moisture. Sealing a piece in stretch wrap or a plastic bag for long-term storage holds ambient moisture against the wood and can cloud a finish or feed mildew in upholstery and cane.
Ventilation matters more than sealing. For storage longer than a few weeks, leave a small gap in the outer wrap so the wood can breathe, and store in a climate-controlled space rather than a garage or unconditioned unit.
Keep pieces off bare floors. Concrete and damp floors wick moisture into legs and feet. Set pieces on wooden pallets or furniture pads.
Impact and Stacking
Never stack heavy items on antique furniture. Stacking pressure cracks veneer, crushes cane, and bows tabletops.
Keep the heaviest pieces low and the lightest on top, and never lay a mirror or glass flat under weight.
Pad every corner, because corners take the first hit and are the most expensive repair.
Long-Term Storage Checklist
Climate-controlled space, not a garage, attic, or unconditioned unit
Pieces on pallets or pads, off bare floors
Outer wrap vented, not sealed airtight
Watch Out Sealing an antique in plastic for months is one of the most common ways a finish gets clouded or a frame gets moldy. Plastic is an outer weather layer for transit, not a storage wrap. For long-term holds, paper and blankets breathe; plastic does not.
Pro Tip If a piece has been in a cold truck or a cold storage unit, let it come to room temperature before you unwrap it. Unwrapping a cold piece in a warm, humid room can condense moisture right onto the finish.
Custom Crating for Antique Furniture
Custom crating for antique furniture is the strongest protection available for oversized or high-value pieces. A crate is built to the exact dimensions of the piece, with foam blocking and bracing inside so nothing shifts, and it also protects against stacking pressure and rough handling that blankets alone can’t absorb.
Frequently Asked Questions
What are the 10 best materials for packing antique furniture?
The 10 materials are moving blankets, bubble wrap, packing paper, foam sheets, double-wall cardboard boxes and sheets, plastic wrap, packing tape, corner protectors, plastic moving boxes, and wooden pallets. Each one plays a specific role: blankets cushion large surfaces, paper wraps finishes, foam absorbs impact, cardboard adds structure, and tape seals everything. For antique furniture, layer these materials so nothing abrasive touches the wood directly.
What materials should you avoid using directly on antique wood?
Avoid direct contact between antique wood and standard plastic wrap, packing tape adhesive, and newspaper. Plastic wrap traps moisture against the finish and can leave cloudy marks. Tape adhesive can pull up shellac or lacquer. Newspaper ink transfers onto porous wood and veneer. Always place packing paper or foam sheets as a barrier layer between the wood and any plastic or tape.
Should antique furniture be wrapped in plastic?
Plastic wrap should never touch the finish directly. Use it only as an outer layer over moving blankets or foam to hold coverings in place and block dirt and moisture during transit. For long-term storage, skip plastic entirely and use breathable materials like moving paper and cotton blankets, because sealed plastic can trap humidity and encourage mold on antique wood.
How do you protect antique furniture from scratches during a move?
Wrap every surface in packing paper first, then add a layer of moving blankets or foam sheets. Slide corner protectors onto edges and legs. Use plastic wrap only over the padding, never against the wood. Keep hardware, keys, and removable parts in labeled bags taped to the piece, and never stack items on top of an antique during loading or transit.
White glove packing is a premium packing service in which trained specialists handle every item by hand, using professional-grade materials and custom crating to protect high-value belongings during a move or relocation.
The term comes from the careful, hands-on treatment given to each item. Nothing gets tossed in a box and taped shut. Instead, specialists wrap, cushion, and crate belongings so they arrive exactly as they left.
Most general moving companies treat packing as an add-on. A crew shows up, wraps what it can, and moves on.
Key Takeaway White glove packing is defined by who does the work and how: trained specialists, professional-grade materials, and custom crating, not just extra tape and bubble wrap.
White Glove Packing vs Standard Packing: Key Differences
The core difference is specialization. Standard packing crews handle volume; white glove packing teams handle value.
Here is how the two compare:
Factor
Standard Packing
White Glove Packing
Who packs
General movers
Trained packing specialists
Materials
Basic boxes, tape, paper
Professional-grade materials, padding and cushioning
The gap widens with what you own. A household of basic furniture does not need white glove care. A home with original artwork, antique furniture, or a climate-sensitive collection does.
What most guides miss is that white glove packing is not just about protection. It is about liability. When a specialist packs and documents each item, responsibility for damage is clear.
What Professional Packing Services Cost in 2026
Professional packing services cost varies widely based on the size of your home, the fragility of your items, and the timeline you need. WePackYou does not publish flat rates because no two jobs are identical. Instead, we build each quote around the actual scope of work.
That said, “it depends” is not a useful answer on its own. Here is how the industry actually prices this work, so you can sanity-check any estimate you receive.
How Packing Is Priced
Most professional packers bill in one of three ways:
Hourly labor plus materials. The most common model for residential jobs. You pay a crew rate per hour (typically higher than a standard moving crew rate because packers are specialists) plus the cost of boxes, paper, tape, and crating. A two-person packing crew usually works through a typical room in a few hours; a full home can take one to three days depending on density and fragility.
Per-item or per-room flat rate. Common for fine art, antiques, and specialty collections. Each painting, sculpture, or piece of case furniture gets its own line item. This is the model that makes custom crating transparent, because you can see exactly what each crate costs.
Percentage of declared value. Used almost exclusively for high-value collections and museum-grade transport. The packer prices the job as a percentage of the insured value of the goods, which aligns their incentive with protecting the pieces.
Factors That Move the Number
Volume and item count: More rooms and more items mean more labor hours.
Fragility level: Fine art, antiques, and specialty goods require custom crating and extra materials.
Materials required: Custom-built wooden crates cost more than standard boxes.
Timeline and scheduling: Evening and weekend packing often carries different rates than weekday work.
Access and layout: Tight hallways, stairs, and oddly shaped items slow the process and add labor time.
Insurance coverage: Fully insured packing jobs may carry a higher rate than basic coverage, because the packer is assuming more liability.
Distance and destination: Interstate and long-distance jobs add transit, climate-controlled storage, and delivery-appointment costs that local jobs do not.
What a Quote Should Actually Show You
A trustworthy packing quote breaks the job into at least four lines: labor hours, materials, crating, and insurance. If you receive a single lump-sum number with no breakdown, ask for the itemization before you sign.
A common mistake is comparing a packing-only quote against a full moving quote. They cover different work. A moving company quote that includes packing often bundles it at a lower line-item price because the packing is rushed. Packing specialists charge for the time and materials that careful work actually requires.
Getting an Accurate Number
To get an accurate number, request a walkthrough. Photos and a phone call work for small jobs, but fine art and full-home moves need an in-person assessment. WePackYou provides free quotes.
Key Takeaway There is no single “white glove packing price.” The number is built from labor hours, materials, crating, insurance, and access.
Packing Services for Fine Art and Antiques
Packing services for fine art and antiques require methods built around each piece, not a one-size-fits-all box. Paintings, sculpture, and antique furniture each demand different handling, and a single wrong material can cause damage that shows up months later.
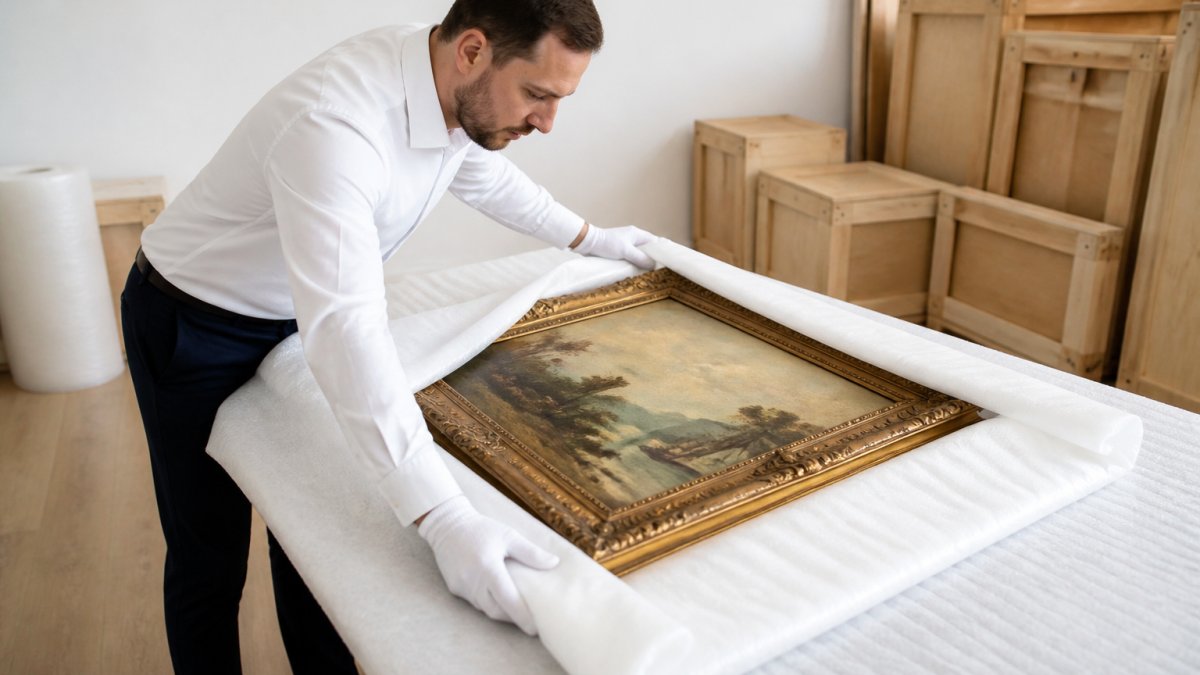
A professional packer carefully wrapping a large framed painting in protective padding inside a bright, clean room with wooden crating materials visible nearby
Paintings and Framed Works
Artwork protection starts with the surface. Glass and acrylic frames get taped in a grid pattern so shards stay contained if the frame cracks. The frame corners get foam padding. Then the whole piece goes into a custom-built crate lined with acid-free material.
A few specifics separate a real fine-art packer from a general mover:
Glass taping. An X or grid pattern of low-tack tape across the glazing keeps broken glass from shifting into the artwork. Never tape the painted surface itself.
Surface interleaving. Glassine or acid-free tissue goes between the frame and any protective board so the finish does not abrade in transit.
Corner and edge protection. Foam or cardboard corner blocks absorb impact at the points most likely to hit a doorframe.
Crate construction. A proper painting crate has a plywood shell, a foam or Ethafoam lining, and interior blocking that keeps the piece from shifting. The piece should not be able to move inside the crate when the crate is tilted.
Orientation. Paintings travel face-up or face-in depending on size and frame type; the packer should tell you which and why.
Antiques and Case Furniture
Antiques add another layer of difficulty. Veneers, inlays, and original finishes react badly to moisture and pressure. Blanket wrapped padding protects the surface without leaving marks. Detachable parts like legs and handles get removed, labeled, and packed separately.
For case furniture, the sequence matters: remove drawers and pack them individually, pad the carcass, then wrap the whole piece in moving blankets secured with stretch wrap.
Custom Crating and Climate Considerations
Custom crating is the strongest protection available for oversized and fragile items. Each crate is built to the exact dimensions of the piece, with interior bracing that stops movement during transit.
Climate matters too. Wood, canvas, and paper expand and contract with humidity. For high-value shipping or interstate transfer, climate-controlled storage and transport protect pieces during the days between packing and delivery. If your collection includes pieces sensitive to temperature swings, ask about climate-controlled options before you book.
Inventory and Documentation for High-Value Pieces
This is the part most guides skip, and it is the part that protects you if something goes wrong. Every high-value piece should be photographed, described in writing, and assigned a unique inventory number before it is packed.
Pair that inventory with a current appraisal. Appraisals support insurance claims, and most full-value protection policies require proof of value, not just proof of ownership. If you have never had your collection appraised, do it before the move, not after. Provenance documents, purchase receipts, and condition reports belong in the same file.
Watch Out Do not let anyone wrap fine art in standard bubble wrap alone. Plastic can trap moisture against a canvas or gilded frame, and the damage often does not appear until weeks after delivery.
Key Takeaway Fine art and antiques are not packed, they are engineered. The materials (acid-free, glassine, Ethafoam), the crate construction, and the inventory documentation are what make a claim defensible if the worst happens.
How to Prepare for White Glove Movers
Preparing for white glove movers takes less work than preparing for a standard move, but a few steps make the process faster and safer.
Start with a walkthrough. Point out every high-value item, including pieces in closets or storage. A specialist cannot protect what they do not know about.
Then handle the basics:
Clear walkways, hallways, and doorways of furniture and clutter
Remove wall hangings you can safely take down yourself
Set aside items you will move personally, such as jewelry and documents
Note any tight turns, narrow stairwells, or low doorways
Confirm parking and elevator access for the crew
Gather any appraisal or provenance documents for high-value pieces
The last item matters more than people expect. Appraisals support insurance claims if something goes wrong.
For seniors downsizing, the process can feel overwhelming.
Insurance, Liability, and Inventory Documentation
Insurance and inventory documentation are what separate a protected move from a gamble. Standard mover liability often pays by weight, not by value, which means a damaged antique might be compensated at a fraction of what it is worth.
Full-value protection is different. It covers the actual value of your items, but only if you can prove that value. That is why inventory documentation matters. Every item gets photographed, described, and logged before it is packed. If a claim is needed, the record exists.
Ask these questions before you sign anything:
Does the coverage pay replacement value or weight-based liability?
White glove packing is worth it when the value of what you own outweighs the cost of protecting it. For a household of basic furniture, standard packing is fine.
The real question is not whether you can afford white glove packing. It is whether you can afford what happens without it. A single damaged painting or shattered heirloom often costs more than the packing itself.
WePackYou specializes exclusively in professional packing, with trained specialists, professional-grade materials, and custom-built wooden crating for oversized and fragile items. If you are planning a move in the DC Metro area, get a free quote and find out exactly what your belongings need.
Frequently Asked Questions
Is it worth paying for white glove packing services?
White glove packing is worth it when your belongings include fragile, oversized, or high-value items that standard packing cannot protect. Trained specialists use professional-grade materials like custom crating, blanket wrapping, and padding and cushioning to prevent damage. For fine furniture, artwork, antiques, or specialty goods, the cost of replacement and the stress of a claim usually outweigh the service fee. If you are moving items with sentimental or monetary value that would be difficult to replace, white glove packing provides asset protection that standard services do not offer.
How much does white glove packing cost compared to standard services?
White glove packing costs more than standard packing because it includes trained specialists, premium materials, custom crating, and additional liability coverage. Pricing depends on the volume of items, the complexity of the packing, and any specialty requirements like climate-controlled storage or unpacking services. Request a free quote so the team can assess your specific items and timeline. Comparing a detailed white glove estimate against a standard quote helps you see the full value, not just the base number.
What items typically require white glove packing?
Items that require white glove packing include fine furniture, original artwork, antiques, chandeliers, mirrors, pianos, sculptures, and delicate items such as porcelain or crystal. Electronics with fragile screens, large TVs, and specialty goods that need climate-controlled storage also benefit. If an item is irreplaceable, has intricate detailing, or requires specialized equipment to move safely, it falls into the white glove category. Professional movers assess each piece and recommend custom crating or blanket wrapping based on its material, weight, and fragility.
Should I hire white glove packers for a military PCS move?
Hiring white glove packers for a military PCS move can reduce stress and protect your household goods during a tight timeline. Military families often receive orders with only a few weeks’ notice, and professional packing services can work around your schedule, including evenings and weekends. White glove packing also provides inventory documentation and secure transportation, which helps if you need to file a claim later. WePackYou works with military families in the DC Metro area and understands the urgency of PCS orders, offering reliable, insured packing that minimizes disruption.
What a DITY Move Actually Requires Before You Commit
A DITY move, now officially called a Personally Procured Move (PPM), is a relocation where you pack, load, and transport your own household goods instead of using government-contracted carriers, then get reimbursed by the military. You take on the labor and logistics, and in return you can keep the difference between what the government would have paid a carrier and what you actually spend.
Watch Out A common mistake is signing a rental agreement or buying packing supplies before your transportation office has approved the PPM in writing. If you move without authorization, you can be denied reimbursement entirely.
Eligibility and Your Transportation Office Appointment
Not every service member qualifies for a PPM, and the rules vary by branch, rank, and type of order. Your first task is a counseling session at your transportation office, where a counselor confirms your eligibility, explains your entitlement, and issues the authorizing paperwork.
Bring your orders, your dependent documentation, and a rough inventory. Ask three questions before you leave the office:
What is my authorized weight allowance?
Is this a full PPM or partial PPM?
What documentation do I need to submit for reimbursement?
PPM Move Weight Tickets: The Step Most Families Get Wrong
Weight tickets are the backbone of your reimbursement, and where most claims fall apart. You need a certified empty weight and a certified loaded weight from a commercial scale; the difference is the weight the government pays you for. No tickets, no payment, and no partial credit for a ticket missing a field.
Empty Weight, Loaded Weight, and Certified Scales
An empty weight ticket records your vehicle or trailer before loading; a loaded weight ticket records the same vehicle after. Both must come from a certified scale and show the same vehicle identification.
Where to find a certified scale:
Truck stops along interstate corridors (the most common option, and usually open 24 hours).
Commercial moving companies that operate their own certified scales.
Landfills and recycling centers that weigh commercial vehicles.
Grain elevators and feed mills in rural areas.
What a Valid Weight Ticket Must Contain
A ticket that’s missing any of these fields can be rejected:
The date and time of the weighing.
The full name and address of the scale operator.
The scale’s certification or license number.
Your vehicle’s license plate or VIN.
The recorded weight, in pounds.
The signature or stamp of the scale operator.
Weighing Station Strategy: The Sequence That Saves Claims
The order of operations matters:
Weigh empty immediately before you load. Not days earlier, not after a partial load, fuel, cargo, and passengers change the number.
Keep the vehicle configuration identical between weighings. Same truck, same trailer, same hitch setup, same fuel level. If you add a cargo carrier between weighings, the comparison is invalid.
Weigh loaded as close to departure as possible. If you unload anything at a friend’s house en route, that weight shouldn’t be in your claim.
If you’re hauling a trailer, weigh the towing vehicle and trailer together both times. Mixing configurations, weighing the truck alone empty and the truck-plus-trailer loaded, invalidates the comparison and can void the claim.
Weighing empty at the origin and loaded on arrival works only if nothing changes in between. If you plan to unpack anything before the loaded weigh-in, do the loaded weigh-in first.
Watch Out Never estimate your weight, and never let a scale operator write a rounded or approximate number. The scale receipt is the only number that counts, and reviewers compare the digits on the ticket to the digits on your claim.
Common Weight Ticket Errors That Delay Payment
Weighing the empty vehicle with a full tank and the loaded vehicle with a partial tank (or vice versa).
Using two different scales that aren’t calibrated to the same standard.
Losing the original ticket and submitting only a photograph.
Forgetting to weigh a second vehicle if you’re towing with one and hauling overflow in another.
Submitting tickets where the vehicle identification doesn’t match the vehicle on your authorization.
Catch an error before you file and re-weigh; catch it after and contact your transportation office immediately, a corrected ticket beats a disputed one.
Packing, Loading, and Vehicle Logistics for Your Move
The logistics phase is where a PPM becomes physical work. You’re responsible for packing materials, loading strategy, and the vehicle, and each decision affects your weight allowance and reimbursement.
Military family loading labeled boxes into a truck for a DITY move with a checklist on the tailgate
Rental Truck Insurance and Mileage Allowance
Rental companies sell damage protection at the counter, and your decision matters: personal auto policies often exclude commercial rental trucks, so confirm coverage before you drive off the lot. If you’re using a government travel card, check whether it carries its own coverage.
Pro Tip Photograph the rental truck’s existing damage before you leave the lot, including the roof and cargo box interior. Disputes over pre-existing damage are one of the most common post-move headaches.
DITY Move Packing Tips That Protect Your Weight Allowance
Weight efficiency is the whole game in a PPM: every pound you don’t haul is a pound you don’t load, and packing well protects both your belongings and your bottom line.
Use sturdy double-wall boxes for heavy items and keep each box under a manageable weight.
Pack books and tools in small boxes; distribute weight evenly across the load.
Disassemble furniture and bag hardware in labeled zip bags taped to the frame.
Fill empty spaces with soft goods rather than air.
Label every box by room and contents on two sides.
Using a Military DITY Move Incentive Calculator Before You Haul
A DITY move incentive calculator estimates what the government would have paid a commercial carrier, then shows the portion you can keep, based on your authorized weight, distance, and your transportation office’s current rate structure.
Partial vs Full PPM Move: Which One Fits Your Orders
The choice comes down to how much you’re willing to move yourself. In a full PPM, you handle everything and receive the full incentive. In a partial PPM, the government moves part of your household goods and you move the rest, useful for small shipments or tight timelines.
Move Type
What You Handle
Best For
Full PPM
All packing, loading, transport
Families with time and a full truckload
Partial PPM
Only the items you choose
Small shipments, tight timelines
Government-arranged
Nothing
Families who want zero logistics work
Filing Your Reimbursement Claim and Surviving the Audit
Reimbursement is not automatic, and the audit is where unprepared claims stall. You submit weight tickets, receipts, and a travel voucher through your transportation office, and a reviewer checks each item against your authorization. The families who get paid fastest treat documentation as part of the move itself.
Assembling the Claim Package
Before you file, confirm which forms your branch requires and whether submission is in person, by mail, or online. Most packages include:
Your orders and any amendments.
The PPM authorization from your counseling session.
Original weight tickets (empty and loaded).
A travel voucher for the mileage portion of the move.
Receipts for operating expenses.
Rental agreements and fuel receipts if you rented a truck.
Operating Expenses (OPE): What Counts and What Doesn’t
Operating expenses (OPE) cover costs directly tied to operating your vehicle during the move. Commonly reimbursable categories include:
Fuel.
Tolls.
Rental truck or trailer fees.
Packing materials (boxes, tape, padding).
Scale fees for weight tickets.
Required insurance on a rental truck, when it’s a condition of the rental.
Pro Tip Organize receipts by category from day one, a simple accordion folder with labeled tabs (Fuel, Tolls, Rental, Supplies, Scale) beats a shoebox every time. Photograph each receipt the day you get it and store the images in a cloud folder named for the move.
The Tax Piece: Incentive vs. Reimbursement
The tax treatment of a PPM payment catches people off guard. Your incentive payment, the portion you keep above actual costs, can be treated as taxable income, while moving expense reimbursements may be handled differently. Rules depend on your orders, branch, and filing situation, so confirm with a tax professional and set aside a portion of the incentive until you know your liability.
Post-Move Audit Preparation: A Checklist
An audit is routine, not an accusation: reviewers check that claimed weight matches your tickets and expenses fall within authorized categories. Build your file so the answers are obvious:
Weight tickets: originals in one envelope, in chronological order, with the empty ticket on top.
Receipts: grouped by OPE category, with a one-page summary sheet listing each expense and its amount.
Authorization paperwork: the counseling session documents, stapled together.
Travel voucher: with odometer readings and fuel receipts matched to the mileage claim.
A cover sheet: your name, rank, branch, order number, and a phone number where you can be reached.
Key Takeaway Treat the audit file as a deliverable you build during the move, not a task you start after it. Every receipt you photograph on the road is one less phone call you make three months later.
Conclusion
A PPM rewards preparation and punishes improvisation. The families who profit confirm their authorization early, weigh carefully, and keep every receipt. The packing itself is where many moves go sideways, and it’s the one part you can hand off entirely. WePackYou provides insured, white-glove packing with professional-grade materials and custom wooden crating for fragile and oversized items, plus flexible evening and weekend scheduling for families on a PCS timeline.
Frequently Asked Questions
How much money can you make doing a DITY move?
Your payout depends on the difference between what the government would pay a commercial carrier and your actual costs. The incentive payment is based on your authorized weight allowance, the distance moved, and current per-pound rates. After subtracting rental truck fees, fuel, packing supplies, and any labor you hire, many families keep a portion of the difference. Use the official DITY move incentive calculator on the Defense Personal Property System to get a real estimate before you commit. Keep every receipt, because the government travel card and reimbursement claim process will require them.
How do I handle PPM move weight tickets?
You need certified weight tickets from a commercial scale for both your empty weight and your loaded weight. Get the empty weight first, before you load anything, at a certified scale near your origin. After loading, weigh again at a certified scale. Both tickets must show the same vehicle, the date, time, location, and the printed weight. Keep the originals and make digital copies. Your transportation office will reject handwritten or uncertified tickets, and without them your reimbursement claim cannot be processed.
What is the difference between a partial vs full PPM move?
A full PPM move means you handle everything yourself, from packing to driving the rental truck, and you receive the full incentive payment. A partial PPM move lets the government ship part of your household goods while you move the rest, which reduces your payout but also reduces your workload. Partial moves suit families with tight timelines or those who want professionals to handle fragile items. Your transportation office can help you calculate which option nets more after operating expenses.
What should I include on my PPM move checklist?
Start with your orders, transportation office appointment, and weight allowance confirmation. Add rental truck reservation, certified scale locations, packing supplies, and a labeled box inventory. Include receipts for every operating expense, your government travel card if issued, and a folder for certified weight tickets. Before the audit, add a final review of your travel voucher and reimbursement claim. A moving checklist that covers both the physical move and the paperwork prevents the two most common reasons claims get delayed.
Step 1: Gather the Best Packing Materials for Fragile Items
The best packing materials for fragile items are corrugated boxes, bubble wrap, packing paper, foam corners, and strong packing tape. Each one handles a different job: cushioning, surface protection, structural support, and sealing.
Here is what a proper kit looks like:
Corrugated boxes in several sizes, double-walled for heavy pieces
Bubble wrap for shock absorption around glass and ceramics
Packing paper for surface protection and void fill
Foam corners for mirrors, frames, and electronics
Packing tape rated for shipping, not masking tape
Moving blankets for furniture and large art
Core Materials You Cannot Skip
Packing paper and bubble wrap do different jobs. Paper protects surfaces. Bubble wrap absorbs shock. Use both, in that order.
Eco-Friendly and Sustainable Alternatives
Many businesses and families now ask for greener options. A common approach is replacing plastic bubble wrap with honeycomb paper wrap, which cushions well and recycles curbside. Cornstarch packing peanuts dissolve in water and compost at home.
Step 2: Choose the Right Box Size and Reinforce It
The right box leaves 2 to 3 inches of cushioning space on every side of the item. Too tight, and impact transfers straight to the glass. Too loose, and the item shifts and cracks against the walls.
Reinforce before you pack:
Tape the bottom seam in a three-strip pattern: center, then both edges.
Add a second layer of tape on heavy boxes.
Line the base with bubble wrap or foam.
Never exceed the box’s weight rating.
Step 3: Master Wrapping Techniques for Packing Fragile Items for Long Distance
Wrap each item as if it will travel alone. Long-distance transit means vibration, stacking, and handling by many hands. Every layer you add absorbs one more impact.
Infographic showing the step-by-step process of packing fragile items using bubble wrap and protective corners
Follow this order:
Lay packing paper flat, then roll the item in it
Wrap bubble wrap around the paper, bubbles facing inward
Tape the wrap so it stays put
Fill hollow items like cups and vases with paper
Place foam corners on frames and mirrors
Double-Boxing and Protective Layering
Double-boxing means placing a wrapped item in a smaller box, then that box inside a larger one with cushioning between them. It is the standard for high-value cargo and delicate items.
Step 4: How to Pack China for a Long Distance Move
To pack china for a long-distance move, wrap each plate and bowl individually, stack them on edge rather than flat, and fill every gap with crumpled paper. Plates stacked flat crack under their own weight. On edge, they flex and survive.
Work plate by plate:
Wrap each piece in packing paper
Add a layer of bubble wrap for fine china
Stand plates vertically in the box like records
Cushion between each piece with paper
Fill the top with void fill before sealing
Step 5: Create a Protective Buffer and Distribute Weight
A protective buffer is the cushioning layer between your item and the box wall. Without it, every bump in the road reaches the glass directly. Aim for 2 to 3 inches of cushioning on all sides, top, and bottom. Crumpled packing paper, air pillows, and foam all work. Padding density matters more than thickness: loose fill compresses under vibration, dense fill holds its shape for the length of the haul.
How Stacking Load Actually Works
When boxes are stacked, the bottom box carries the weight of everything above it. A 40-pound box on top of a 30-pound box means the bottom box is now supporting 70 pounds of static load, before the truck hits a pothole, which briefly multiplies that force. Corrugated board has a stacking strength rating, and it drops fast with humidity and time.
Heavy boxes go on the bottom, near the axles. The axle line is the most stable point in the trailer; weight there does not lever the load on turns.
Never stack anything on a box marked fragile. This is the single most common cause of crushed china and cracked mirrors in long-distance moves.
Keep stacks below chest height. Tall stacks tip on turns and shift on braking.
Match box sizes within a stack. A small box bridging two larger ones becomes a crush point.
Distribute weight left to right. An unbalanced load leans into turns and transfers force to whatever is on the low side.
Load Shift Is the Hidden Risk
A load that is tight at origin can loosen by mile 200. Vibration settles fill, tape stretches, and gaps open. Once a box can move, it becomes a projectile on hard braking. Two habits prevent this:
Fill every void in the truck, not just in the box. Use furniture pads, extra boxes, or load bars to lock the stack.
Re-check the load at the midpoint if you are driving yourself. A two-minute inspection at a rest stop catches shifting before it becomes damage.
Key Takeaway Buffer protects the item inside the box. Weight distribution protects the box inside the truck. Long-distance damage usually happens at the second layer, not the first.
Step 6: Label, Document, and Insure High-Value Cargo
Fragile labeling is your first line of defense. Write “FRAGILE” and “THIS WAY UP” on every side of the box in bold marker. Arrows help handlers who do not read English. Number each box (“3 of 12”) so a missing carton is obvious at delivery.
Build a Claim-Ready Inventory Before You Pack
Carriers do not pay claims based on what you remember owning. They pay based on what you can prove. Before you seal a single box:
Photograph each high-value item from multiple angles on a plain background. Include a coin or ruler for scale on small pieces.
Photograph existing damage. A chip or scratch that predates the move is not a claim, but an undocumented one becomes a dispute.
Record serial numbers for electronics, and keep receipts or appraisals for art, antiques, and jewelry.
Photograph the packed box interior right before sealing. This proves how the item was cushioned.
Keep a written inventory with a replacement value next to each line. Replacement value, not purchase price, is what most claims are measured against.
Understand the Two Levels of Mover Coverage
Moving companies are not insurers, and the coverage they sell is not the same as a homeowner’s or renter’s policy. Two structures dominate:
Released value protection is the basic, often-included option. It typically reimburses by weight, commonly around 60 cents per pound per article, which means a 5-pound laptop that cost $1,200 may be reimbursed far less than its value. This is the default unless you actively upgrade.
Full-value protection costs more but pays based on repair, replacement, or current market value, up to a declared amount. Ask for it in writing and read the exclusions, many policies exclude items packed by the owner, which is a critical detail if you packed the fragile boxes yourself.
Note it on the delivery inventory before the crew leaves. Once you sign a clean delivery receipt, disputing damage later is much harder.
Photograph the damage and the packaging as it arrived.
File the claim in writing within the carrier’s stated window, often nine months for interstate moves, but confirm your specific contract.
Keep copies of everything. Claims get lost; your copies do not.
Watch Out Never pack valuables in unmarked boxes or skip the photo record. If a claim happens, carriers ask for proof of condition and value. No documentation usually means no payout, and owner-packed boxes are the first thing a carrier points to when denying one.
Step 7: When to Hire Professional Packing Services for Fragile Items
Hire professional packing services for fragile items when the value of the item, the distance, or your timeline makes a mistake too costly. Fine art, antiques, mirrors, and electronics are the usual tipping points.
Common Mistakes to Avoid When Packing Fragile Items for Long Distance
The biggest mistake is treating a long-distance move like a trip across town. A box that survives ten minutes in a car may not survive ten hours in a truck.
Watch for these:
Skipping the buffer. No cushioning means direct impact.
Overpacking a box. Too heavy, and the bottom gives out.
Using weak tape. Cheap tape peels in heat.
Stacking flat plates. They crack under their own weight.
Forgetting moisture protection. Humidity warps frames and ruins paper wrap. Add a moisture barrier for long hauls.
No inventory. No photos, no proof, no claim.
Pro Tip Photograph the inside of each packed box right before you seal it. If a claim ever happens, that photo proves how the item was packed and what condition it left in.
Frequently Asked Questions
What is the best way to pack fragile items for a long-distance move?
Wrap each item individually in packing paper, then add a layer of bubble wrap for cushioning. Use double-boxing for high-value pieces and fill all gaps with void fill so nothing shifts. Reinforce box seams with packing tape, label every box as fragile, and keep heavy items at the bottom. For antiques or art, custom crating gives the best impact protection during long-distance transit.
How do you pack extremely fragile items like glass and china?
Wrap each plate and glass in packing paper, then bubble wrap. Stand plates on edge rather than flat, and use cell dividers for glasses. Fill the box with cushioning material so items cannot move, then seal and reinforce it. For china sets, double-boxing adds an extra layer of shock absorption. Label the box fragile and mark it this way up before loading.
Should I use custom crating for high-value fragile items?
Custom crating is worth it for art, antiques, mirrors, and anything irreplaceable. A built-to-fit wooden crate prevents flexing, absorbs transit vibration, and protects against crush damage in a loaded truck. For long-distance moves, crating also makes insurance claims easier because the packing method is documented. If the item would be hard or impossible to replace, crate it.
How do I label fragile boxes for professional movers?
Write fragile in large letters on at least two sides of every box, plus this way up arrows on the top. Note the contents and room on a side panel, not the top, so labels stay visible when boxes are stacked. Keep an inventory list with photos of high-value items. Give the movers a copy so they know which boxes need extra care during loading and unloading.
Damage Assessment: Identifying What Needs Fine Art Restoration
Fine art restoration is the careful process of repairing and preserving artworks so they survive for future generations. Before any treatment begins, a trained conservator must assess the damage. This step decides everything that follows.
A Four-Pass Assessment You Can Do Safely
Work in this order, and stop the moment anything looks unstable.
What You Are Looking For
Cracking, flaking, or lifting paint (called cupping when edges curl upward)
Discolored or yellowing varnish
Water stains, mold, or smoke residue
Tears, holes, or sagging canvas
Loose or damaged frames, and rusted hardware
Foxing, the small brown spots that signal moisture and possible mold
Bloom, the cloudy haze that forms on varnish in humid conditions
The DIY vs. Professional Decision Rule
The question is not “can I fix this?” It is “can I afford to be wrong?” Use this rule:
Safe for a collector: dusting a stable, low-value piece with a soft brush; improving storage conditions; documenting condition; moving a piece with proper support.
Not safe for a collector: anything involving liquid, solvents, adhesives, heat, or pressure. That includes wiping, scrubbing, ironing a canvas, applying household cleaners, and “testing” a product on a hidden corner.
Call a conservator immediately: active mold, flaking or powdering paint, a growing tear, smoke or water damage, a sagging canvas, or any piece you plan to insure, sell, or lend.
Watch Out Never wipe, scrub, or apply household cleaners to a damaged piece. You can push pigment into the canvas or spread mold, turning a small repair into a costly one. If you are unsure, stop and photograph instead.
When to Escalate Beyond a Conservator
Some findings require more than a treatment plan. If you see active mold, evidence of pests, or damage that suggests the piece was stored in a flood or fire, you may also need a fine art appraisal update, an insurance notification, and a conservator who specializes in that damage type. Bring your documentation to that first conversation, it shortens the assessment and often lowers the initial billable hours.
The Fine Art Restoration Process: From Surface Cleaning to Varnish Removal
The fine art restoration process moves from the least invasive steps to the most involved. Conservators follow a simple rule: do as little as possible to make the piece stable and readable again.
Infographic showing the fine art restoration process from surface cleaning to varnish removal steps
Canvas Relining and Structural Stabilization
When a canvas sags, tears, or grows brittle, it needs structural help. Canvas relining attaches the original canvas to a new support for strength. Conservators also patch tears and tighten loose fabric. These steps restore structural integrity without hiding the artist’s original work.
Fine Art Packing and Crating for Transport to a Conservator
Fine art packing and crating protects a piece on its way to the conservator. Most damage happens in transit, not in the studio. A proper crate holds the artwork still and blocks moisture, dust, and impact.
Good packing follows strict art handling protocols:
Use corner blocks so the art never touches the crate walls
Label the crate “fragile” and note which side faces up
Pro Tip Ask your conservator for the crate back after treatment. A well-built crate can be reused for future moves, storage, or loan exhibitions, saving you money later.
Understanding Painting Restoration Cost: What Drives the Price
Painting restoration cost depends on the type and amount of damage, not just the size of the piece. Two paintings the same size can differ widely in price. The useful part is understanding how a conservator actually builds a number, so you can read an estimate instead of just reacting to the total.
The Three Pricing Models You Will See
Conservators and studios generally quote one of three ways:
Hourly plus materials. Common for condition assessments, surface cleaning, and small in-painting. You pay for time logged and supplies consumed. Ask for the hourly rate and a not-to-exceed cap.
Flat fee per treatment. Common for defined jobs like a single tear repair or a varnish removal on a standard-size canvas. The conservator absorbs the risk if the job runs long.
Phased or capped estimate. Common for complex or uncertain pieces. The conservator quotes the first phase (stabilization), then re-quotes after the piece is on the table and the true condition is visible.
A common pattern is that the initial written estimate is a range, not a fixed price, because hidden damage, old repairs, overpaint, a previous relining, is often invisible until cleaning begins. Reputable conservators disclose this up front rather than surprising you mid-treatment.
How a Conservator Builds the Number
When you ask for a written estimate, a thorough one breaks down into line items like these:
Condition assessment and written report. Often a separate, billable first step. This document is what your insurer will want.
Treatment hours by phase. Surface cleaning, varnish removal, tear repair, in-painting, and structural work are usually priced separately because each carries different risk.
Materials. Solvents, consolidants, archival adhesives, lining canvas, stretchers, and in-painting pigments. Museum-grade materials cost more and are usually itemized.
Structural work. Relining, tear mending, and stretcher replacement are the most labor-intensive line items and the ones most likely to change the total.
Documentation and photography. Some studios bill for before/after imaging and treatment records; ask whether it is included.
Crating, transport, and insurance. Often quoted by a separate vendor. These are frequently forgotten when collectors budget.
A Practical Cost-Estimation Framework
Use this to sanity-check any quote you receive. It is a framework, not a price list, actual figures vary by region, conservator, and piece.
New support, weeks of studio time, senior conservator hours
Severe
Mold, smoke, or water damage
Stabilization first, then full treatment; often phased
Questions That Change the Quote
Ask these before you sign anything:
Is the estimate hourly, flat, or phased?
What is excluded, crating, transport, insurance, re-framing?
What happens if hidden damage is found mid-treatment?
Will I get a written condition report and before/after images?
Are treatments reversible, and does that affect the price?
Pro Tip Ask for the estimate in phases. A phased quote lets you approve stabilization first, see the piece, and then decide whether to fund full aesthetic restoration. It also gives your insurer a clean paper trail if the claim is partial.
Where Collectors Overspend
The most common overspend is commissioning full aesthetic restoration on a piece whose value does not justify it. A conservator can tell you the difference between stabilization (stopping deterioration) and restoration (returning appearance). For many mid-value works, stabilization alone protects the asset at a fraction of the cost. Ask explicitly which one your quote covers.
Art Insurance Requirements and Claims Handling for Damaged Pieces
Art insurance requirements vary by policy, but most insurers want proof of value and condition. A fine art appraisal sets that value. Keep it current, since insurers often ask for updates every few years.
When damage happens, follow these steps:
Photograph the damage before you touch anything
Contact your insurer right away
Get a written condition report from a conservator
Keep every receipt for packing, transport, and treatment
Key Takeaway Your documentation is your strongest asset in a claim. Photos, appraisals, and condition reports do more to protect your payout than any single phone call.
DIY vs. Professional Risk Assessment: When to Call a Conservator
DIY vs. professional risk assessment comes down to one question: can you afford to be wrong? For low-value decorative pieces, gentle dusting is fine. For anything with real value, call a conservator.
Call a professional when you see:
Active mold, flaking, or a growing tear
Smoke or water damage
Loose paint or a sagging canvas
Any piece you plan to insure or sell
Digital Documentation and Preventative Conservation
Digital documentation and preventative conservation keep small problems from becoming big ones. Document each piece with high-resolution photos, a written condition report, and its history. This record, called provenance, proves ownership and value.
Preventative care is mostly about control:
Keep humidity regulation steady, since swings cause cracking
Limit light to reduce UV protection needs and fading
Store works in archival materials, never plastic wrap
Check for oxidization and mold every few months
Conclusion: Protecting Your Collection with Expert Care
Caring for fine art takes patience and the right hands at every step. Damage can start small and spread fast, so early action matters.
Frequently Asked Questions
How much does fine art restoration cost?
Painting restoration cost depends on the extent of damage, the size of the piece, and the techniques required. Minor surface cleaning may cost less, while structural repairs like canvas relining or in-painting push costs higher. Most conservators charge hourly or by project scope. WePackYou recommends requesting a detailed written estimate that breaks down labor, materials, and any specialized treatments before committing to a restoration plan.
What is the difference between art restoration and art conservation?
Art restoration focuses on returning a piece to its original appearance, often using in-painting or varnish removal. Art conservation prioritizes long-term preservation using reversible treatments and archival materials that stabilize the work without altering its character. Conservators follow museum-grade techniques and curatorial standards. For valuable pieces, conservation is usually the preferred approach because it protects both structural integrity and future restorability reporting.
When should I seek professional art conservation services instead of handling it myself?
Call a professional when the damage involves structural issues like tears, flaking paint, or canvas relining needs. DIY attempts at surface cleaning or varnish removal can cause irreversible damage, especially on older pieces with unstable pigment. If the artwork has sentimental or market value above a few hundred dollars, professional assessment is worth the cost. Conservators also document existing damage for insurance valuation and future provenance records.
What are art insurance requirements for a damaged piece during restoration?
Most fine art insurance policies require you to report damage promptly and provide documentation such as photographs and appraisals. Before restoration begins, notify your insurer and get approval for the conservator you plan to use. Keep all receipts and a condition report from the conservator. WePackYou advises reviewing your policy’s coverage limits and deductibles, since some policies cap restoration payouts or exclude gradual deterioration.
Custom Crating for Sculptures and Large Artwork: When and Why You Need It
Standard packing techniques — bubble wrap, moving blankets, cardboard boxes — are adequate for the vast majority of household items. But for certain categories of valuable, fragile, or oversized art and objects, standard packing is not sufficient. Custom crating is the professional standard for these items, and understanding when it’s necessary can mean the difference between a piece arriving intact and a piece arriving damaged beyond repair.
What Is Custom Crating?
A custom crate is a wooden enclosure built specifically for a single piece — sized to fit the object exactly, with internal foam or fabric support structures designed to hold the piece in position regardless of how the crate is oriented or handled. Unlike standard boxes, which rely on packing materials to fill the gap between the object and the box walls, a custom crate is engineered so the object cannot move at all during transit.
Custom crates are built from plywood or OSB, typically with internal foam padding cut to the exact profile of the object. For particularly valuable pieces, the foam is covered in archival fabric to prevent any chemical interaction between the foam and the object’s surface. The crate is typically stenciled with handling instructions: “THIS SIDE UP,” “FRAGILE,” and sometimes the object’s dimensions and weight.
When Is Custom Crating Necessary?
Custom crating is appropriate for several categories of objects. Large oil paintings and works on canvas — particularly those over 36 inches in any dimension — benefit from crating because standard flat packs cannot adequately protect the canvas surface from impact or pressure. Sculptures with thin or protruding elements (arms, fingers, antlers, thin sections) require crating because these elements cannot be adequately protected with wrap alone. Stone and bronze pieces over a certain weight require crating for structural support during transit. Antique furniture with fragile veneer, marquetry, or gilding may require crating for long-distance moves.
As a general rule, if an object is irreplaceable, has significant monetary value (over $5,000), or has elements that cannot be adequately protected with standard materials, custom crating should be considered.
The Crating Process
Custom crating begins with a physical assessment of the piece. A professional crating specialist measures the object, assesses its vulnerabilities, and designs a crate that addresses those specific vulnerabilities. For a bronze sculpture, this might mean a foam cradle that supports the base and prevents any lateral movement. For a large painting, it might mean a face frame that holds the canvas away from the crate walls and a back support that prevents the stretcher bars from flexing.
The crate is then built, typically from 3/4-inch plywood, with internal foam cut on a CNC machine to the exact profile of the object. The piece is placed in the crate, the foam is adjusted until there is zero movement, and the crate is closed and stenciled.
Custom Crating in the DC Metro Area
WePackYou provides custom crating services for art collectors, galleries, and estate clients throughout Maryland, DC, and Northern Virginia. Our fine art packing specialists have experience with sculpture, painting, ceramics, and decorative arts of all types and scales. We work with clients in Potomac, McLean, Georgetown, Bethesda, and throughout the region to ensure their most valuable pieces travel safely. Contact us for a consultation and crating estimate.
How to Declutter Before a Move Without Regretting It Later
Post-move regret about decluttering decisions is extremely common. “I threw away my grandmother’s mixing bowls.” “I donated the kids’ artwork and now I wish I had it.” “I sold the dining table and now we have nothing to eat on.” The goal of pre-move decluttering is to reduce what you move without creating regrets — and that requires a more thoughtful approach than simply filling trash bags in a panic the week before moving day.
The Difference Between Clutter and Belongings
Not everything you don’t use is clutter. Some items are rarely used but genuinely important: the formal china set used at Thanksgiving, the camping gear used once a year, the sewing machine that comes out for specific projects. These are not clutter — they are belongings with a defined purpose and a real place in your life. The question to ask is not “Do I use this regularly?” but “Does this have a place in my life going forward?”
True clutter is items that have no defined purpose, no emotional significance, and no realistic future use. Duplicate kitchen gadgets. Clothes that haven’t fit in five years. Broken items you’ve been meaning to fix for three years. These are the items that should go without hesitation.
The 90-Day Rule
A useful heuristic for borderline items: if you haven’t used it in 90 days and can’t identify a specific occasion in the next 90 days when you will use it, it’s a candidate for donation or sale. This rule doesn’t apply to seasonal items (holiday decorations, winter gear, summer equipment) or sentimental items, but it works well for the vast middle category of “stuff.”
Sentimental Items: The Hardest Category
Sentimental items are the most difficult to declutter because their value is not functional — it’s emotional. The key insight is that the memory is not in the object. You can photograph a sentimental item, write about it, share the story with your children, and then let the object go. The memory persists; the object doesn’t have to.
For items with both sentimental and practical value — a grandmother’s cast iron skillet, a father’s tools — keep them. For items that are purely sentimental and taking up significant space — boxes of children’s artwork, decades of greeting cards — consider a selective curation approach: keep the ten most meaningful pieces and photograph the rest.
Practical Decluttering Strategies
Work room by room, not category by category. Trying to gather all clothing from across the house and make decisions about it simultaneously is overwhelming. Working through one room at a time is more manageable and produces visible progress.
Set a donation pickup date before you start decluttering. Having a truck coming on a specific date creates a deadline that prevents the “I’ll decide later” paralysis. Junk King, 1-800-GOT-JUNK, and local charities in the DC Metro area all offer scheduled pickup services.
Don’t declutter alone if you can help it. Having a trusted friend or family member present — someone who can offer perspective without judgment — makes the process significantly easier. Professional organizers who specialize in pre-move decluttering are also available in the DC Metro area if you need more structured support.
What Not to Declutter
There are categories of items that should almost never be decluttered before a move: important documents (tax records, medical records, legal documents), irreplaceable photographs, items with significant monetary value that you haven’t had appraised, and anything you’re decluttering primarily because you’re tired and want to be done. Decisions made in exhaustion are the ones most likely to be regretted.
WePackYou serves homeowners throughout Maryland, DC, and Northern Virginia. Our packing teams work efficiently with whatever you decide to keep — contact us for a free quote and let us handle the packing while you focus on the decisions.